Basti's Adventures in CP (2022)

Soapmaking Forum

Help Support Soapmaking Forum:

This site may earn a commission from merchant affiliate links, including eBay, Amazon, and others.

basti

Well-Known Member
Joined
Oct 13, 2022
Messages
279
Reaction score
1,384
Location
FL, US
Decided to put things together and share my progress in a single thread that I can continue to add replies to.

I have my eighth CP soap in the mold right now, happily soaking up some residual warmth so I can get some marvelous greens. But for now, here are my first few adventures.

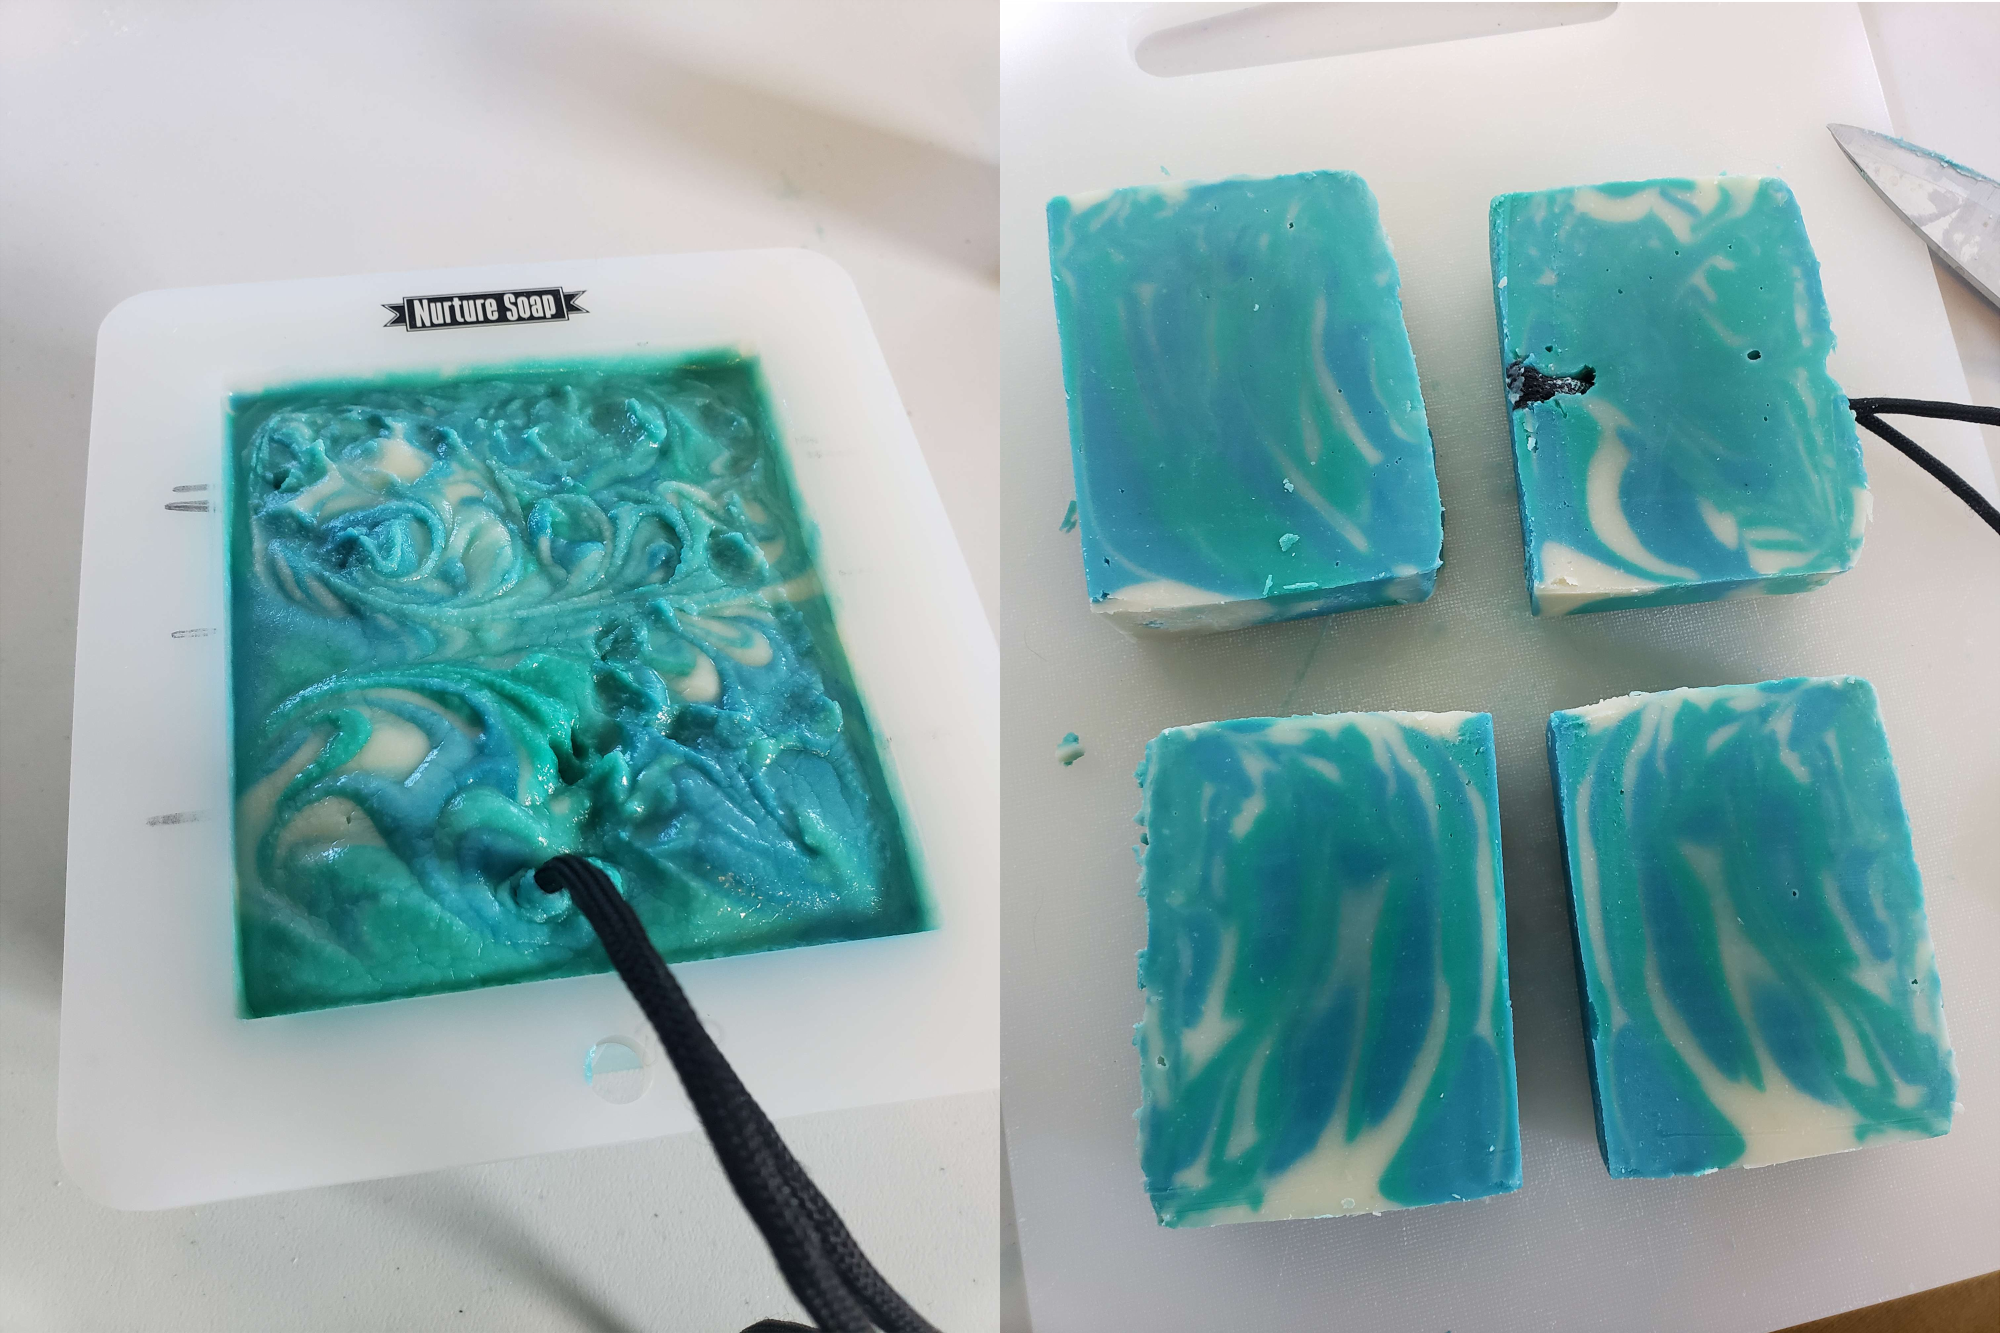
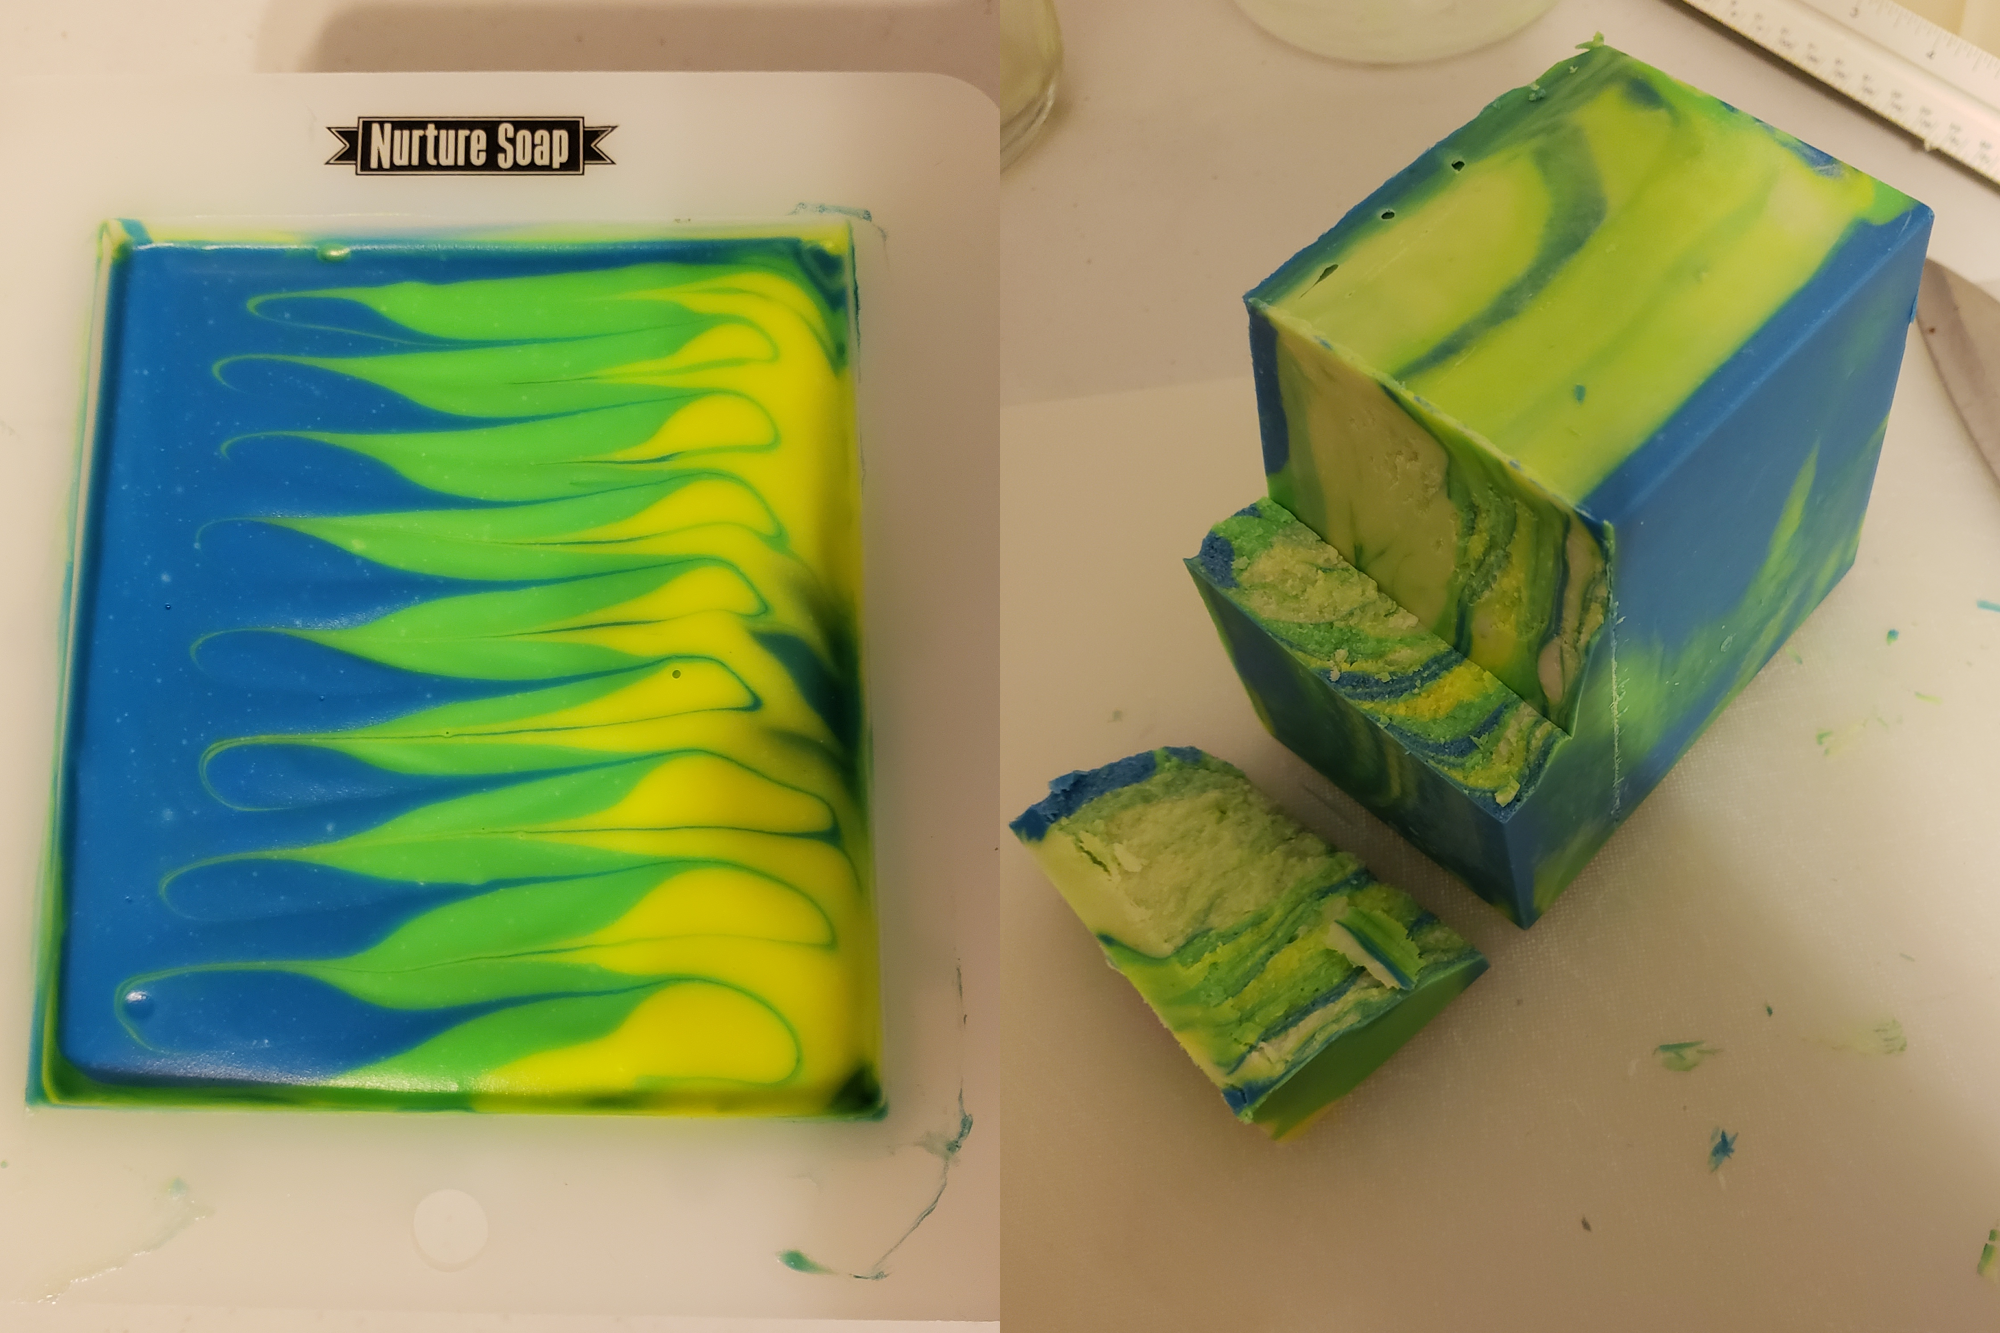
Batch #1 - 100% CO 20% SF with Local Saltwater
aroha.png

The good: First soap! The colors are nice other than the partial gel and I managed to get some semblance of a design despite getting spooked by medium-thick trace (it comes SO much faster than I ever expected)
The bad: Partial gel! But that's okay~
The ugly: Soap on a rope positioning... could use some work 🤡
Lesson Learned: This is absolutely not as intimidating of a process as I thought it was

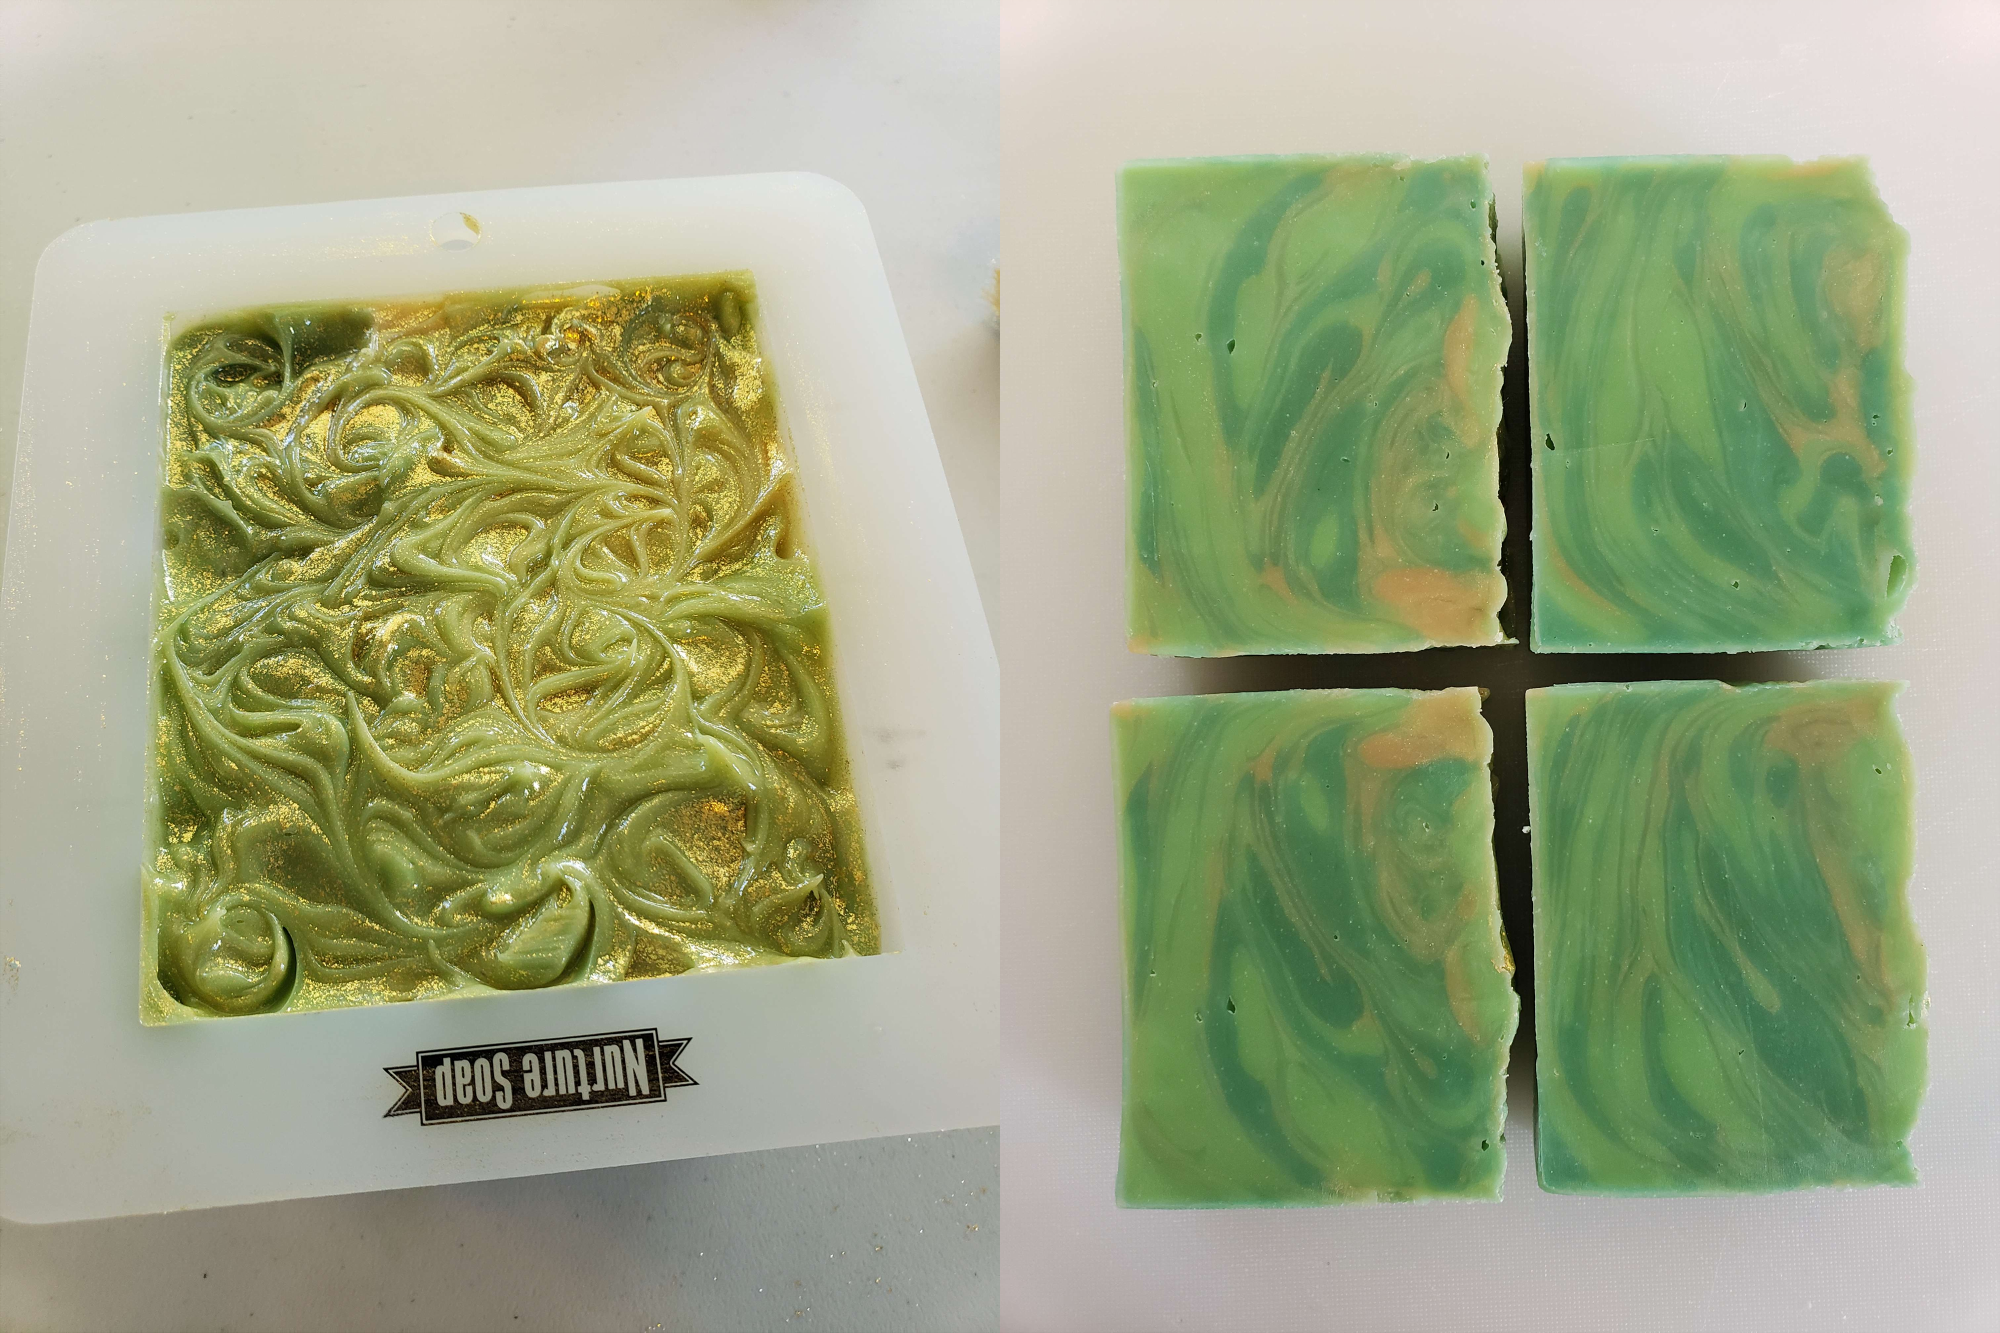
Batch #2 - 5 Oil Blend with Chamomile Tea
apple_1.png

The good: The swirls are so lovely and I adore the greens.
The bad: I chowdered the edges of this one up because I jumped the gun peeking at this one a little too early. I ended up having to stick it in the freezer to demold it at 48 hours.
The ugly: The gold is rather meh. I'd maybe just go for another green instead.
Lesson Learned: Lower the water amount in SoapCalc. Add a little salt to harden bars quickly (and added Sodium Lactate to my NS cart)

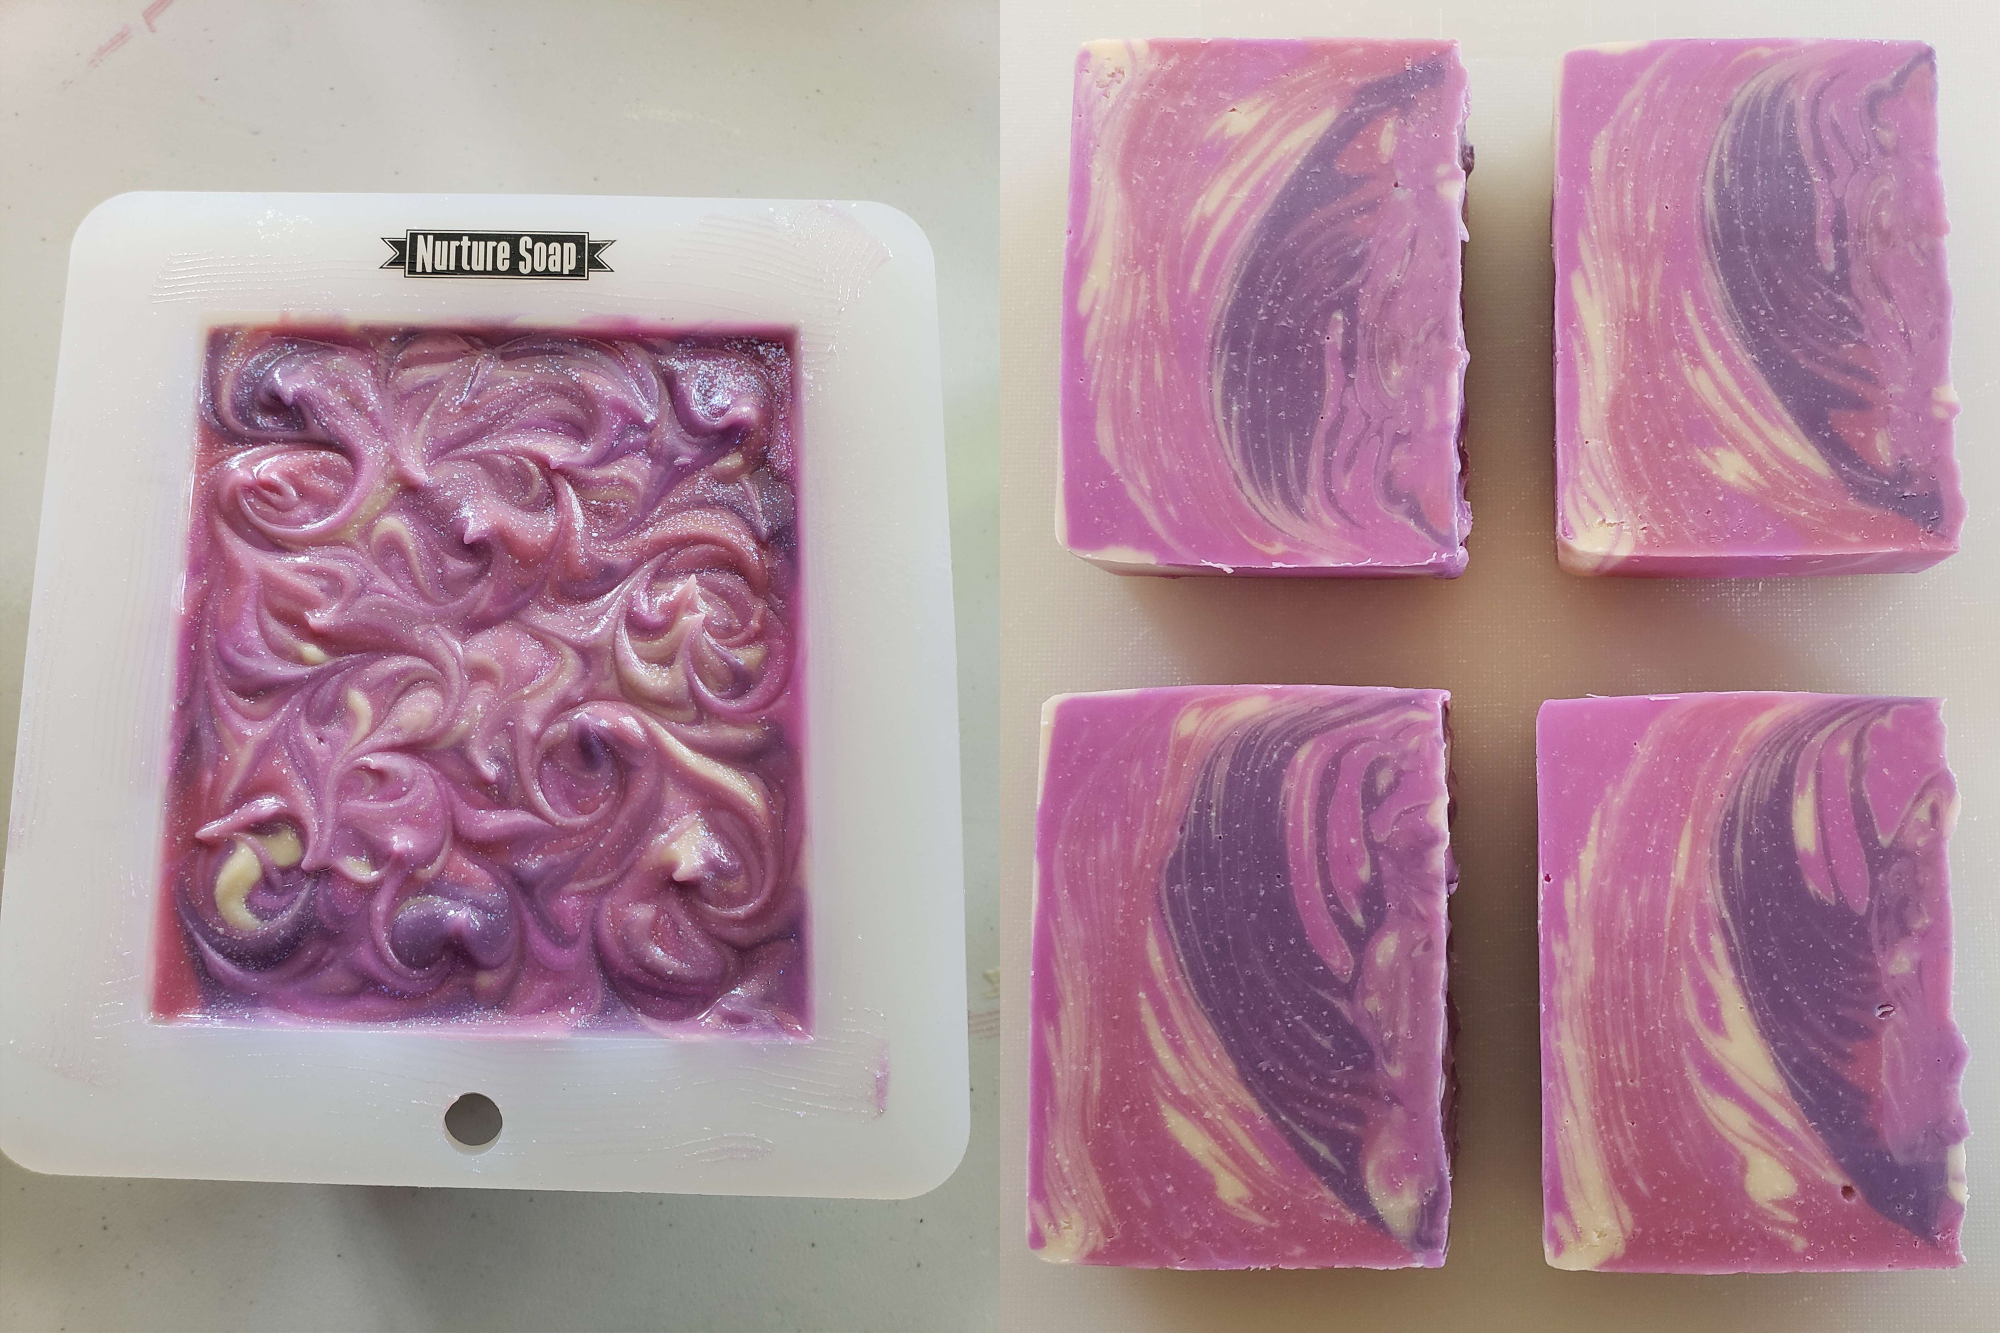
Batch #3 - 5 Oil Blend with Hibiscus and Moringa Tea
lilac_1.png

The good: I mean. LOOK AT IT. She speaks for herself.
The bad: Yeah, sure, maybe there's stearic spots but they look like stars 😜 It's intentional...
The ugly: Not quite a proper ugly, but the Hibiscus and Moringa Tea turned from beautiful ruby red to RADIOACTIVE GREEN when I added the lye to it. Really, really bizarre. And really, really fun.
Lesson Learned: Heat up hard oils a little more or just accept the stearic spots as they are (it's homemade! it adds to the charm...). 1 tsp PPO of white is a lie.

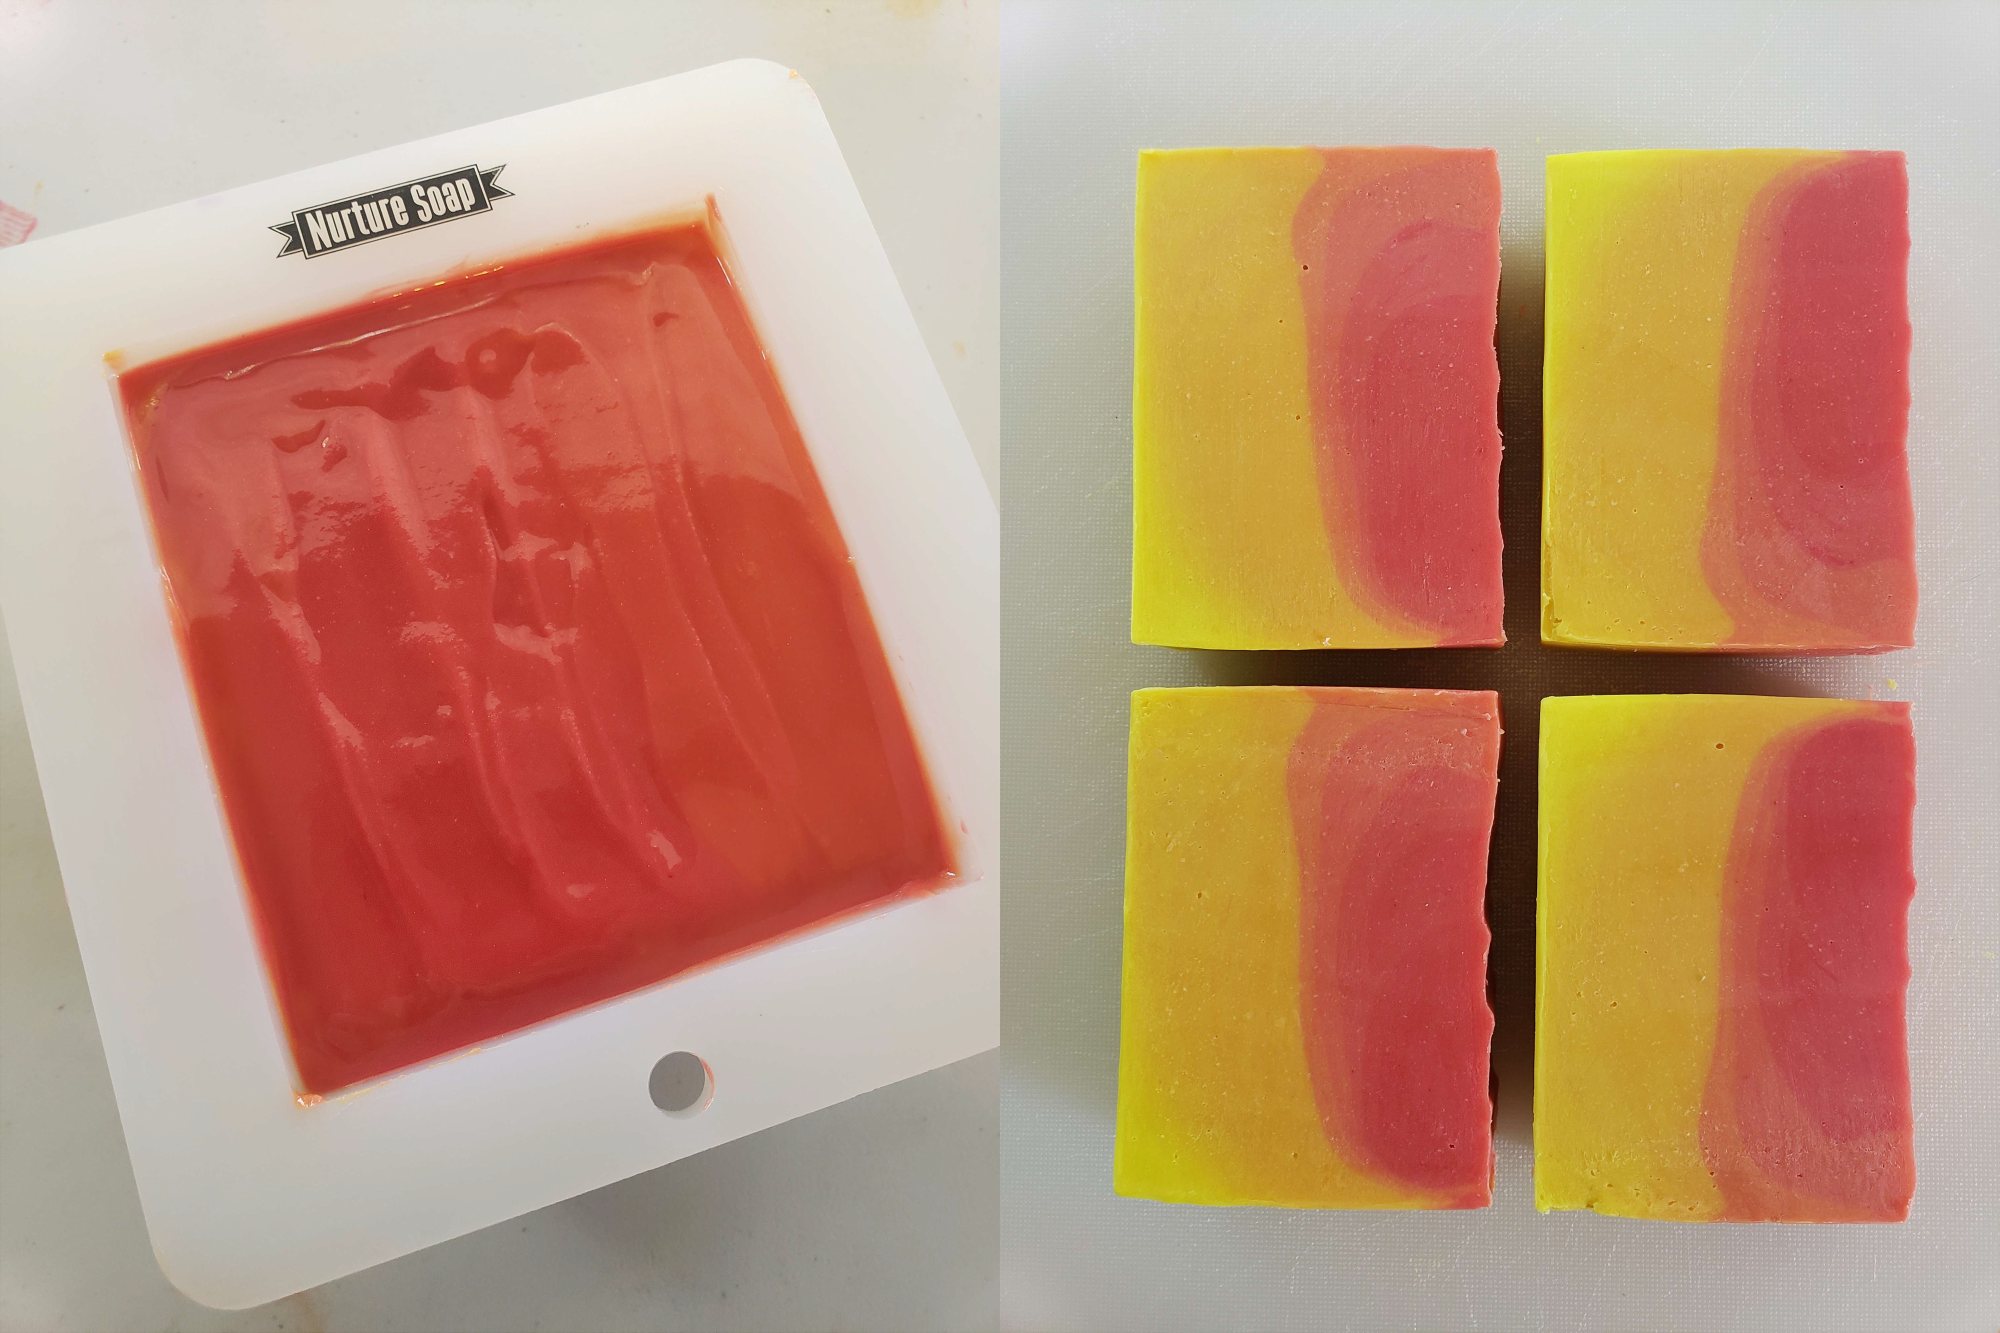
Batch #4 - 5 Oil Blend with Mango Hard Seltzer (Not White Claw, but similar to White Claw)
mango_1.png

The good: The vision was there and everyone could guess what the design was meant to be. It was a fun first attempt at a gradient.
The bad: Absolutely nothing! This was my first batch where I really felt like I didn't stick blend too long.
The ugly: Okay, maybe doing a three color gradient as my first attempt wasn't the brightest idea. Go big or go home, I guess.
Lesson Learned: When your brother leaves behind an alcoholic beverage that absolutely no one in your household is going to drink, make soap out of it. Easy.

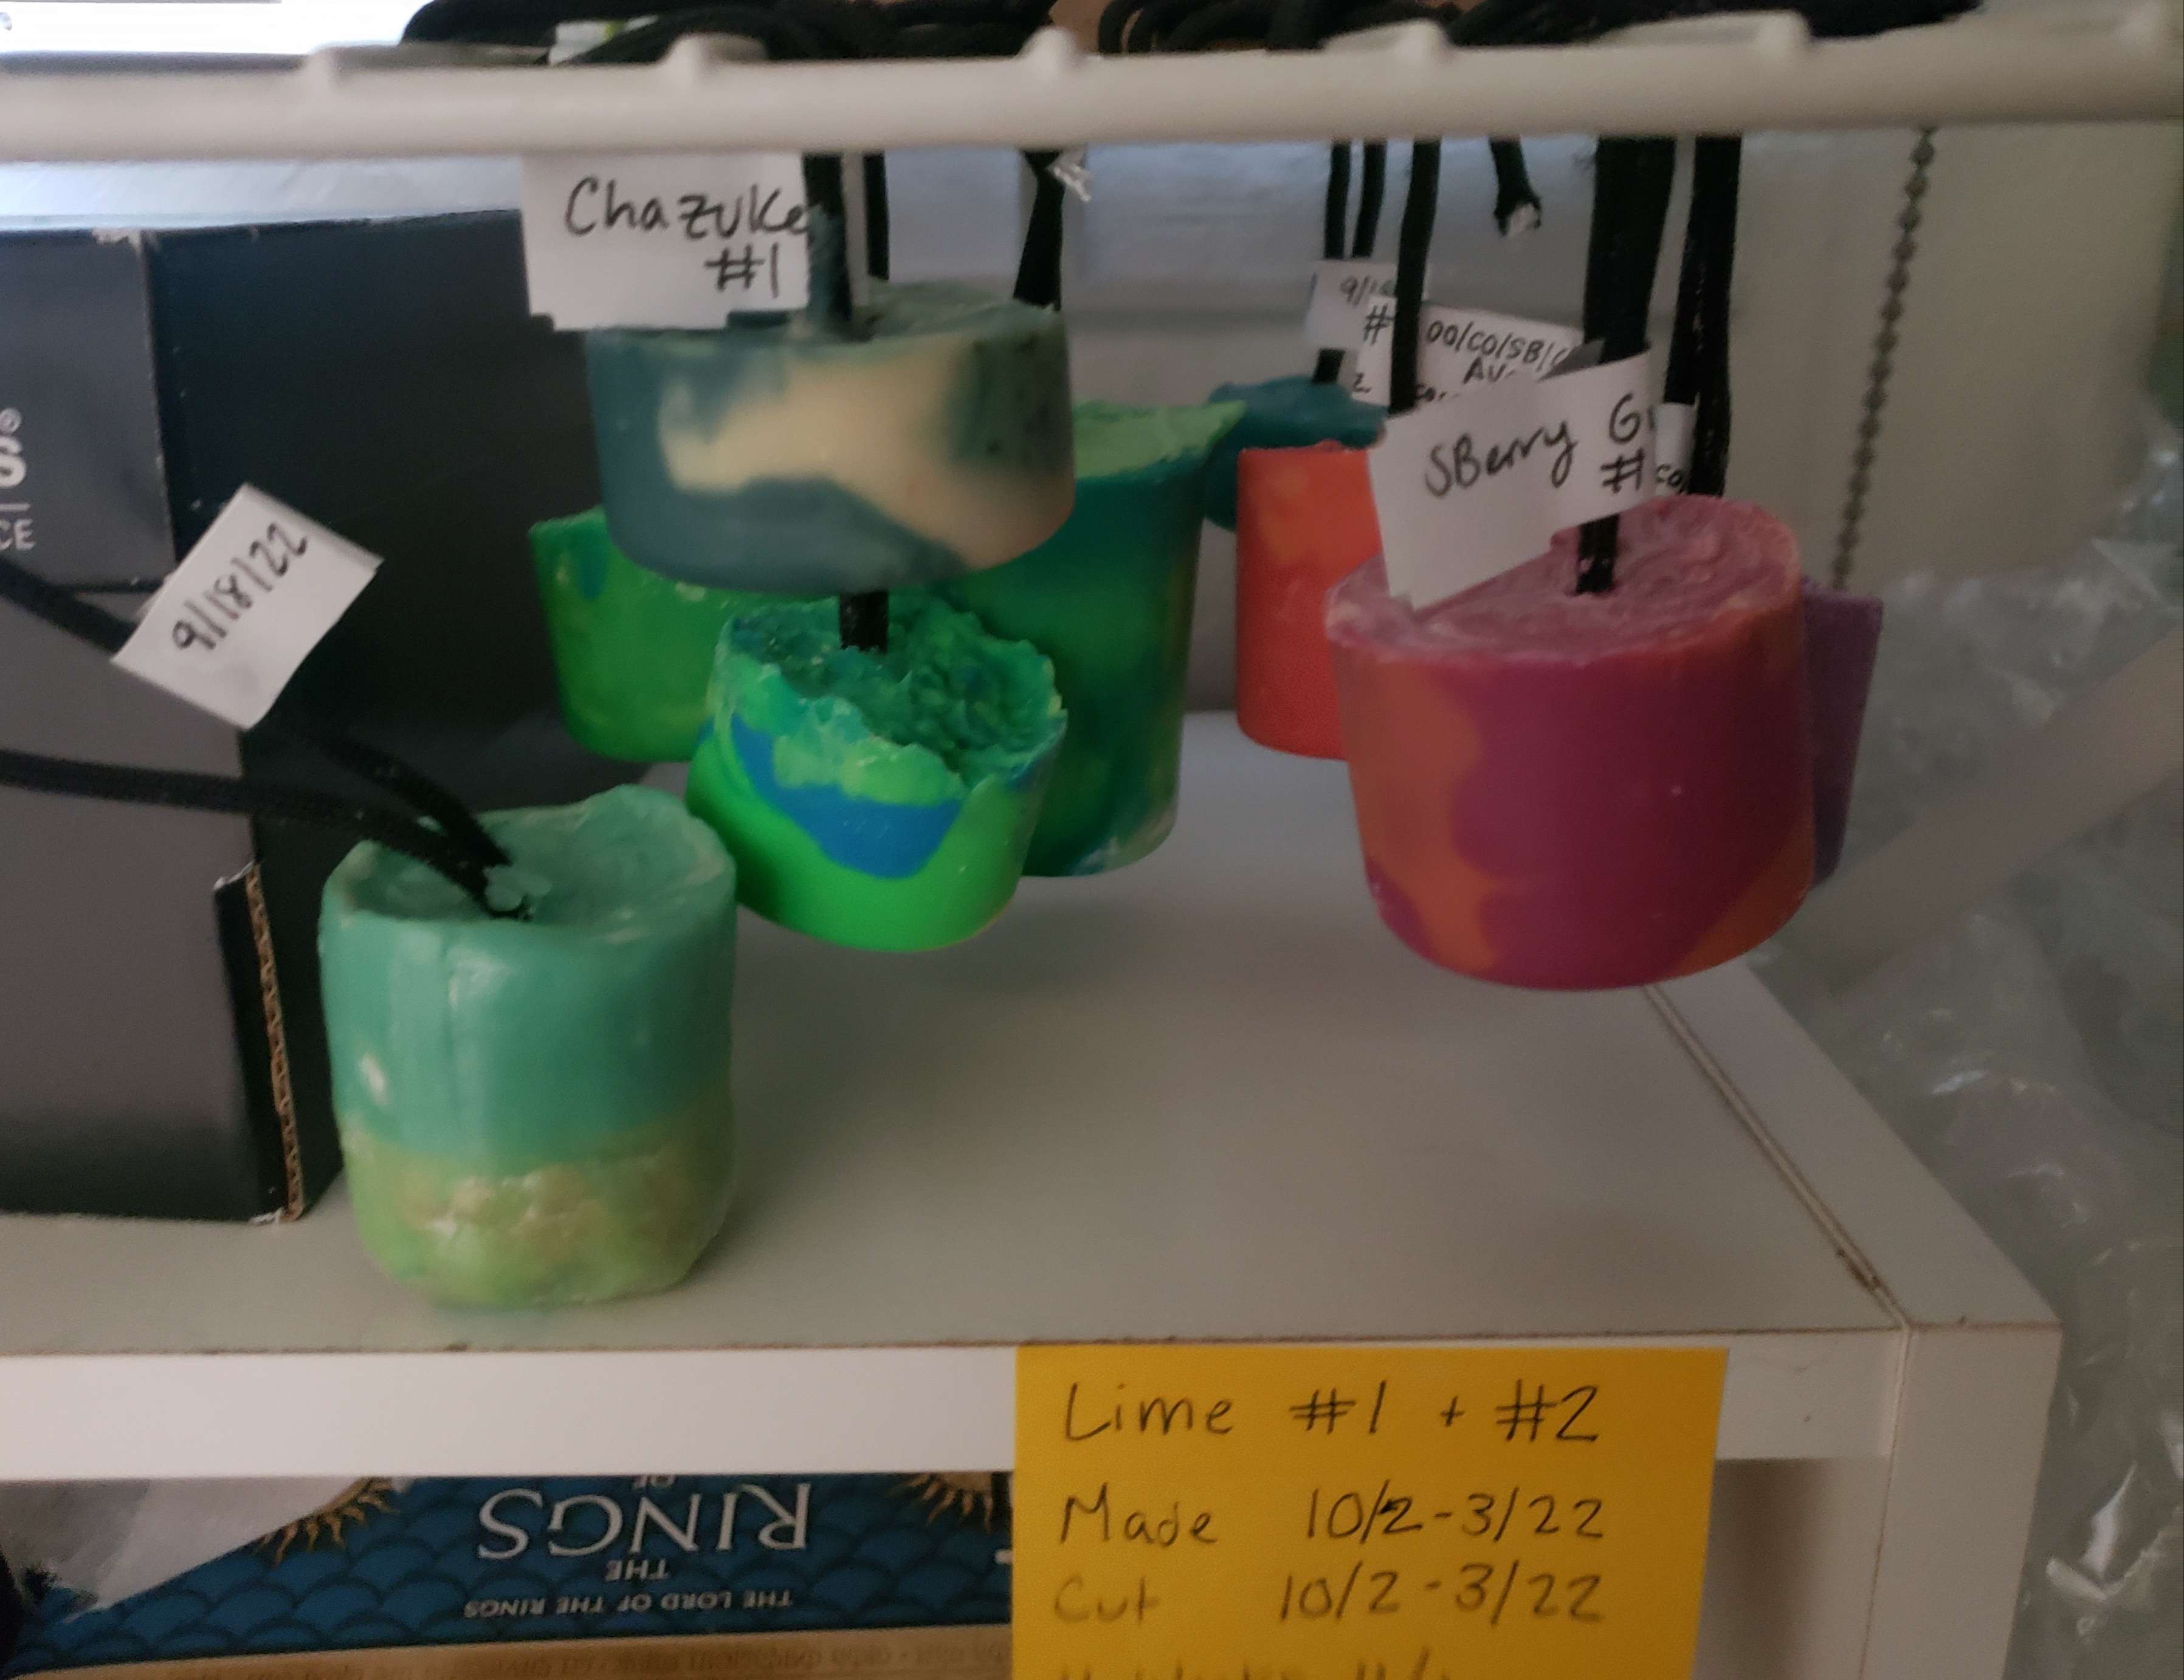
Batch #5 - CO/OO/Castor, high SF with Lime Hard Seltzer
lime_1.png

The good: ......................... the top?
The bad: This soap was a bit of a clown fiesta from start to finish, and that's okay. I had it too good for too long LOL
The ugly: Other than the obvious, the white batter I had accelerated very quickly, so while the rest of my colors flowed smoothly, that one was a gunky mess.
Lesson Learned: When nice people tell you to use a single bar mold for high CO/Salt soaps, maybe listen to them.

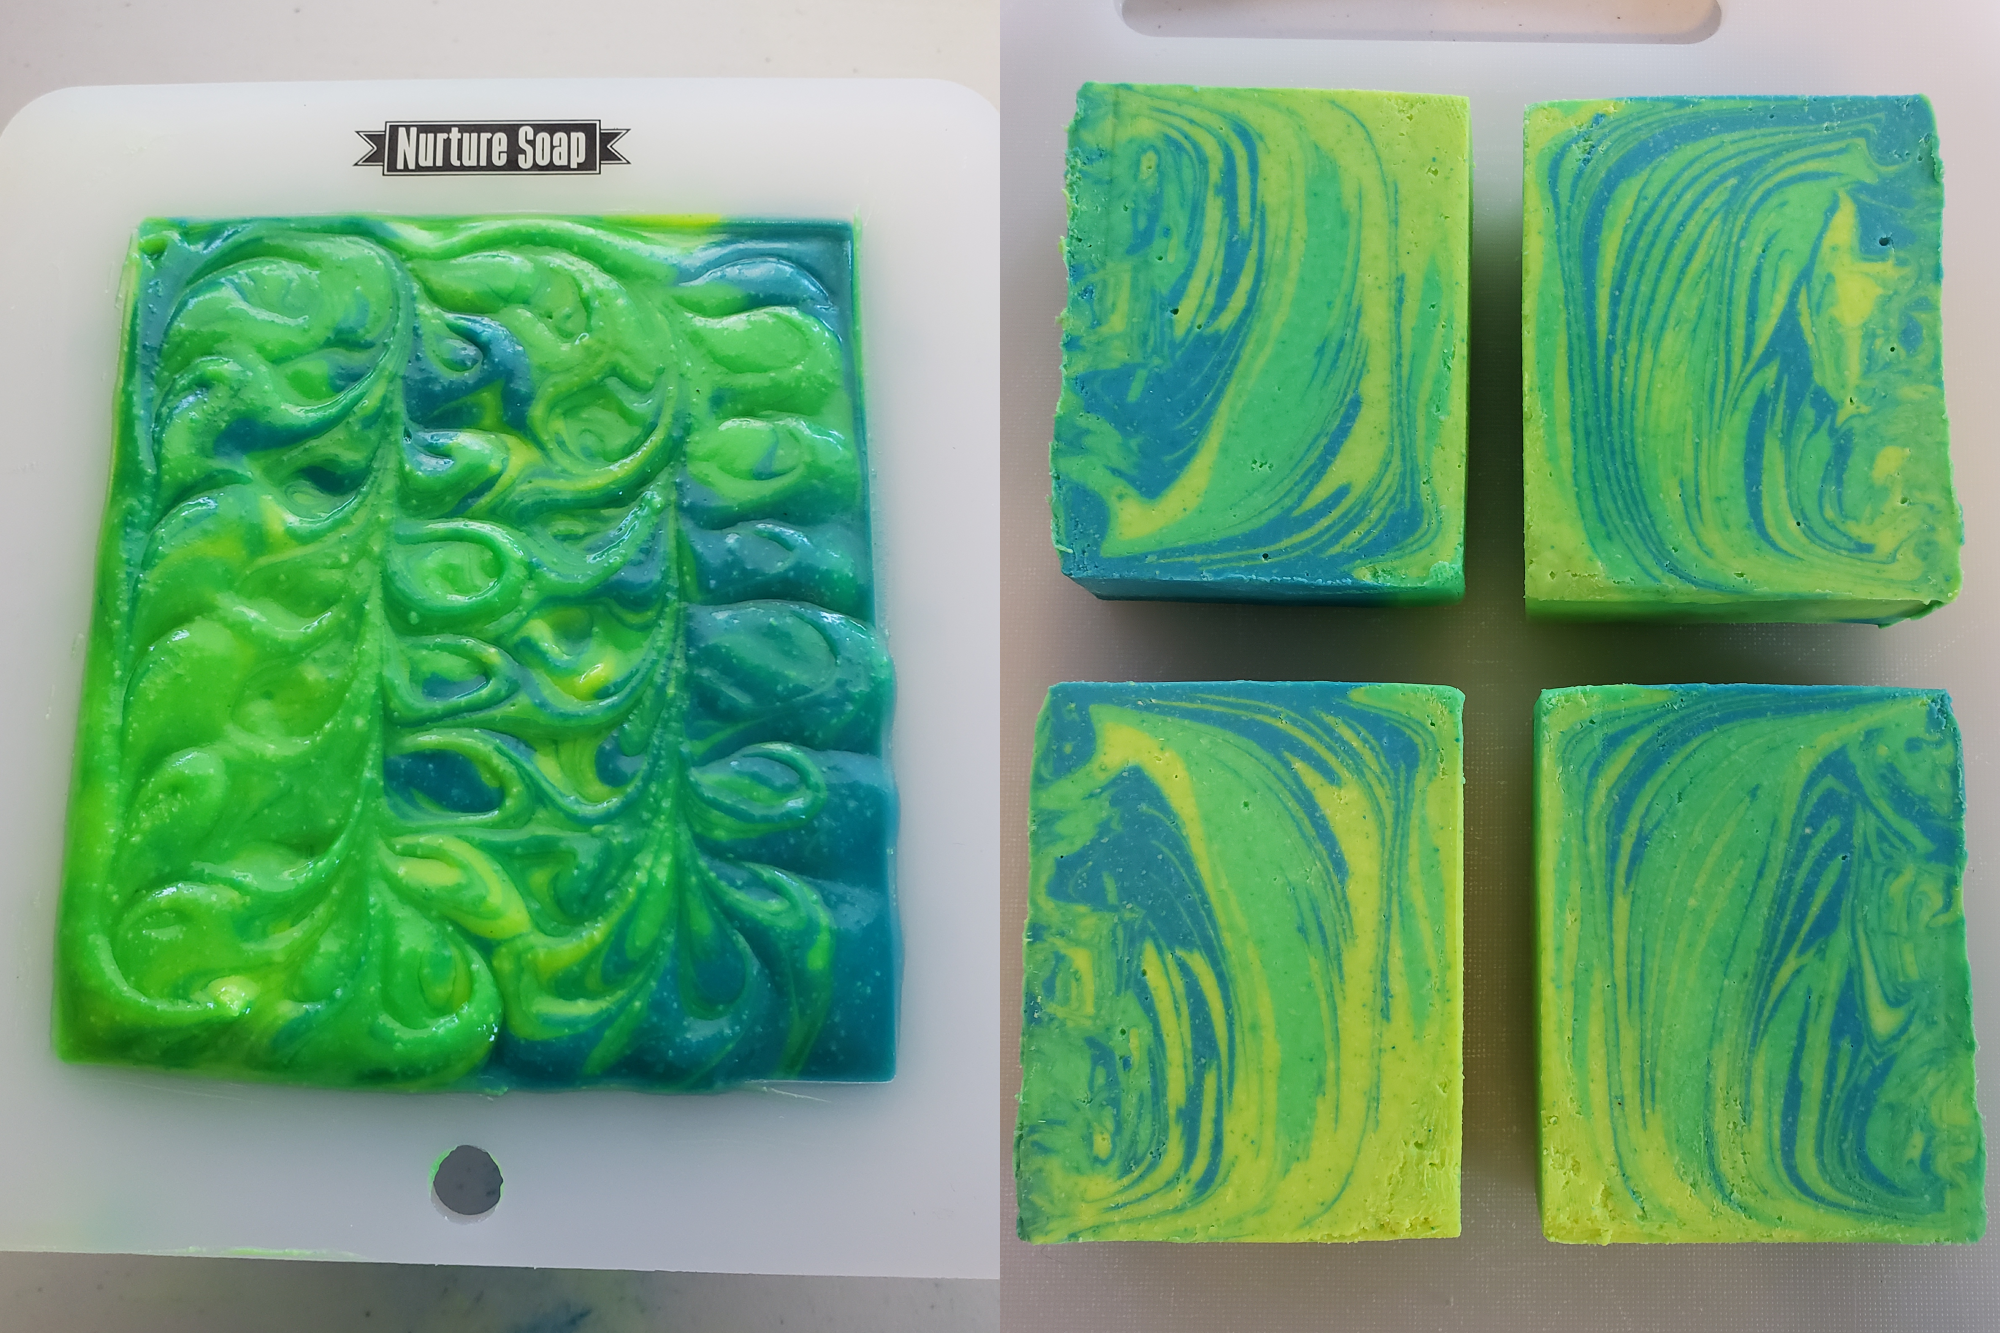
Batch #6 - OO/CO/Castor with Distilled Water
lime_2.png

The good: I shredded half of Batch #5, recycling some of it in this batch using the Ciaglia method. The swirl is infinitely better than the previous batch, and the colors are really fun with the green tinge to all of them. I like the freckles caused by the scraps, too.
The bad: I should've reduced my batter amount to account for the scraps, as I had quite a bit of overflow. It'll all get used in the end, so it's no big deal, really.
The ugly: Unmolded a little too soon, so the bars got a little smooshy on the edges. What can I say, I was excited.
Lesson Learned: A failed batch (that isn't like. horrifyingly unusable) is just an opportunity for something better~

Batch #7 - 6 Oil Blend with Strawberry Guava Hard Seltzer
strawberry_guava.png

The good: This batch went smoothly. It was my first time using Kokum Butter, so that was fun. I grabbed it on sale from WSP just to play around with.
The bad: Stearic spots again, curses. But I'm not gonna be bothered by it, especially since I used two butters for the first time and just need to get a little hotter for the new butter.
The ugly: Buehler. Buehler. Buehler. Where did my third color go. They looked so different in the pitchers, but alas 💀
Lesson Learned: Reading up on the Colorant On The Milk Carton, the supplier says it fades in CP, so I'll save it for my MP soaps.


Tomorrow is my 4 week date for my first batch, so I'm very excited to see how the first cure check goes.
 
Thank you everyone! 🥰

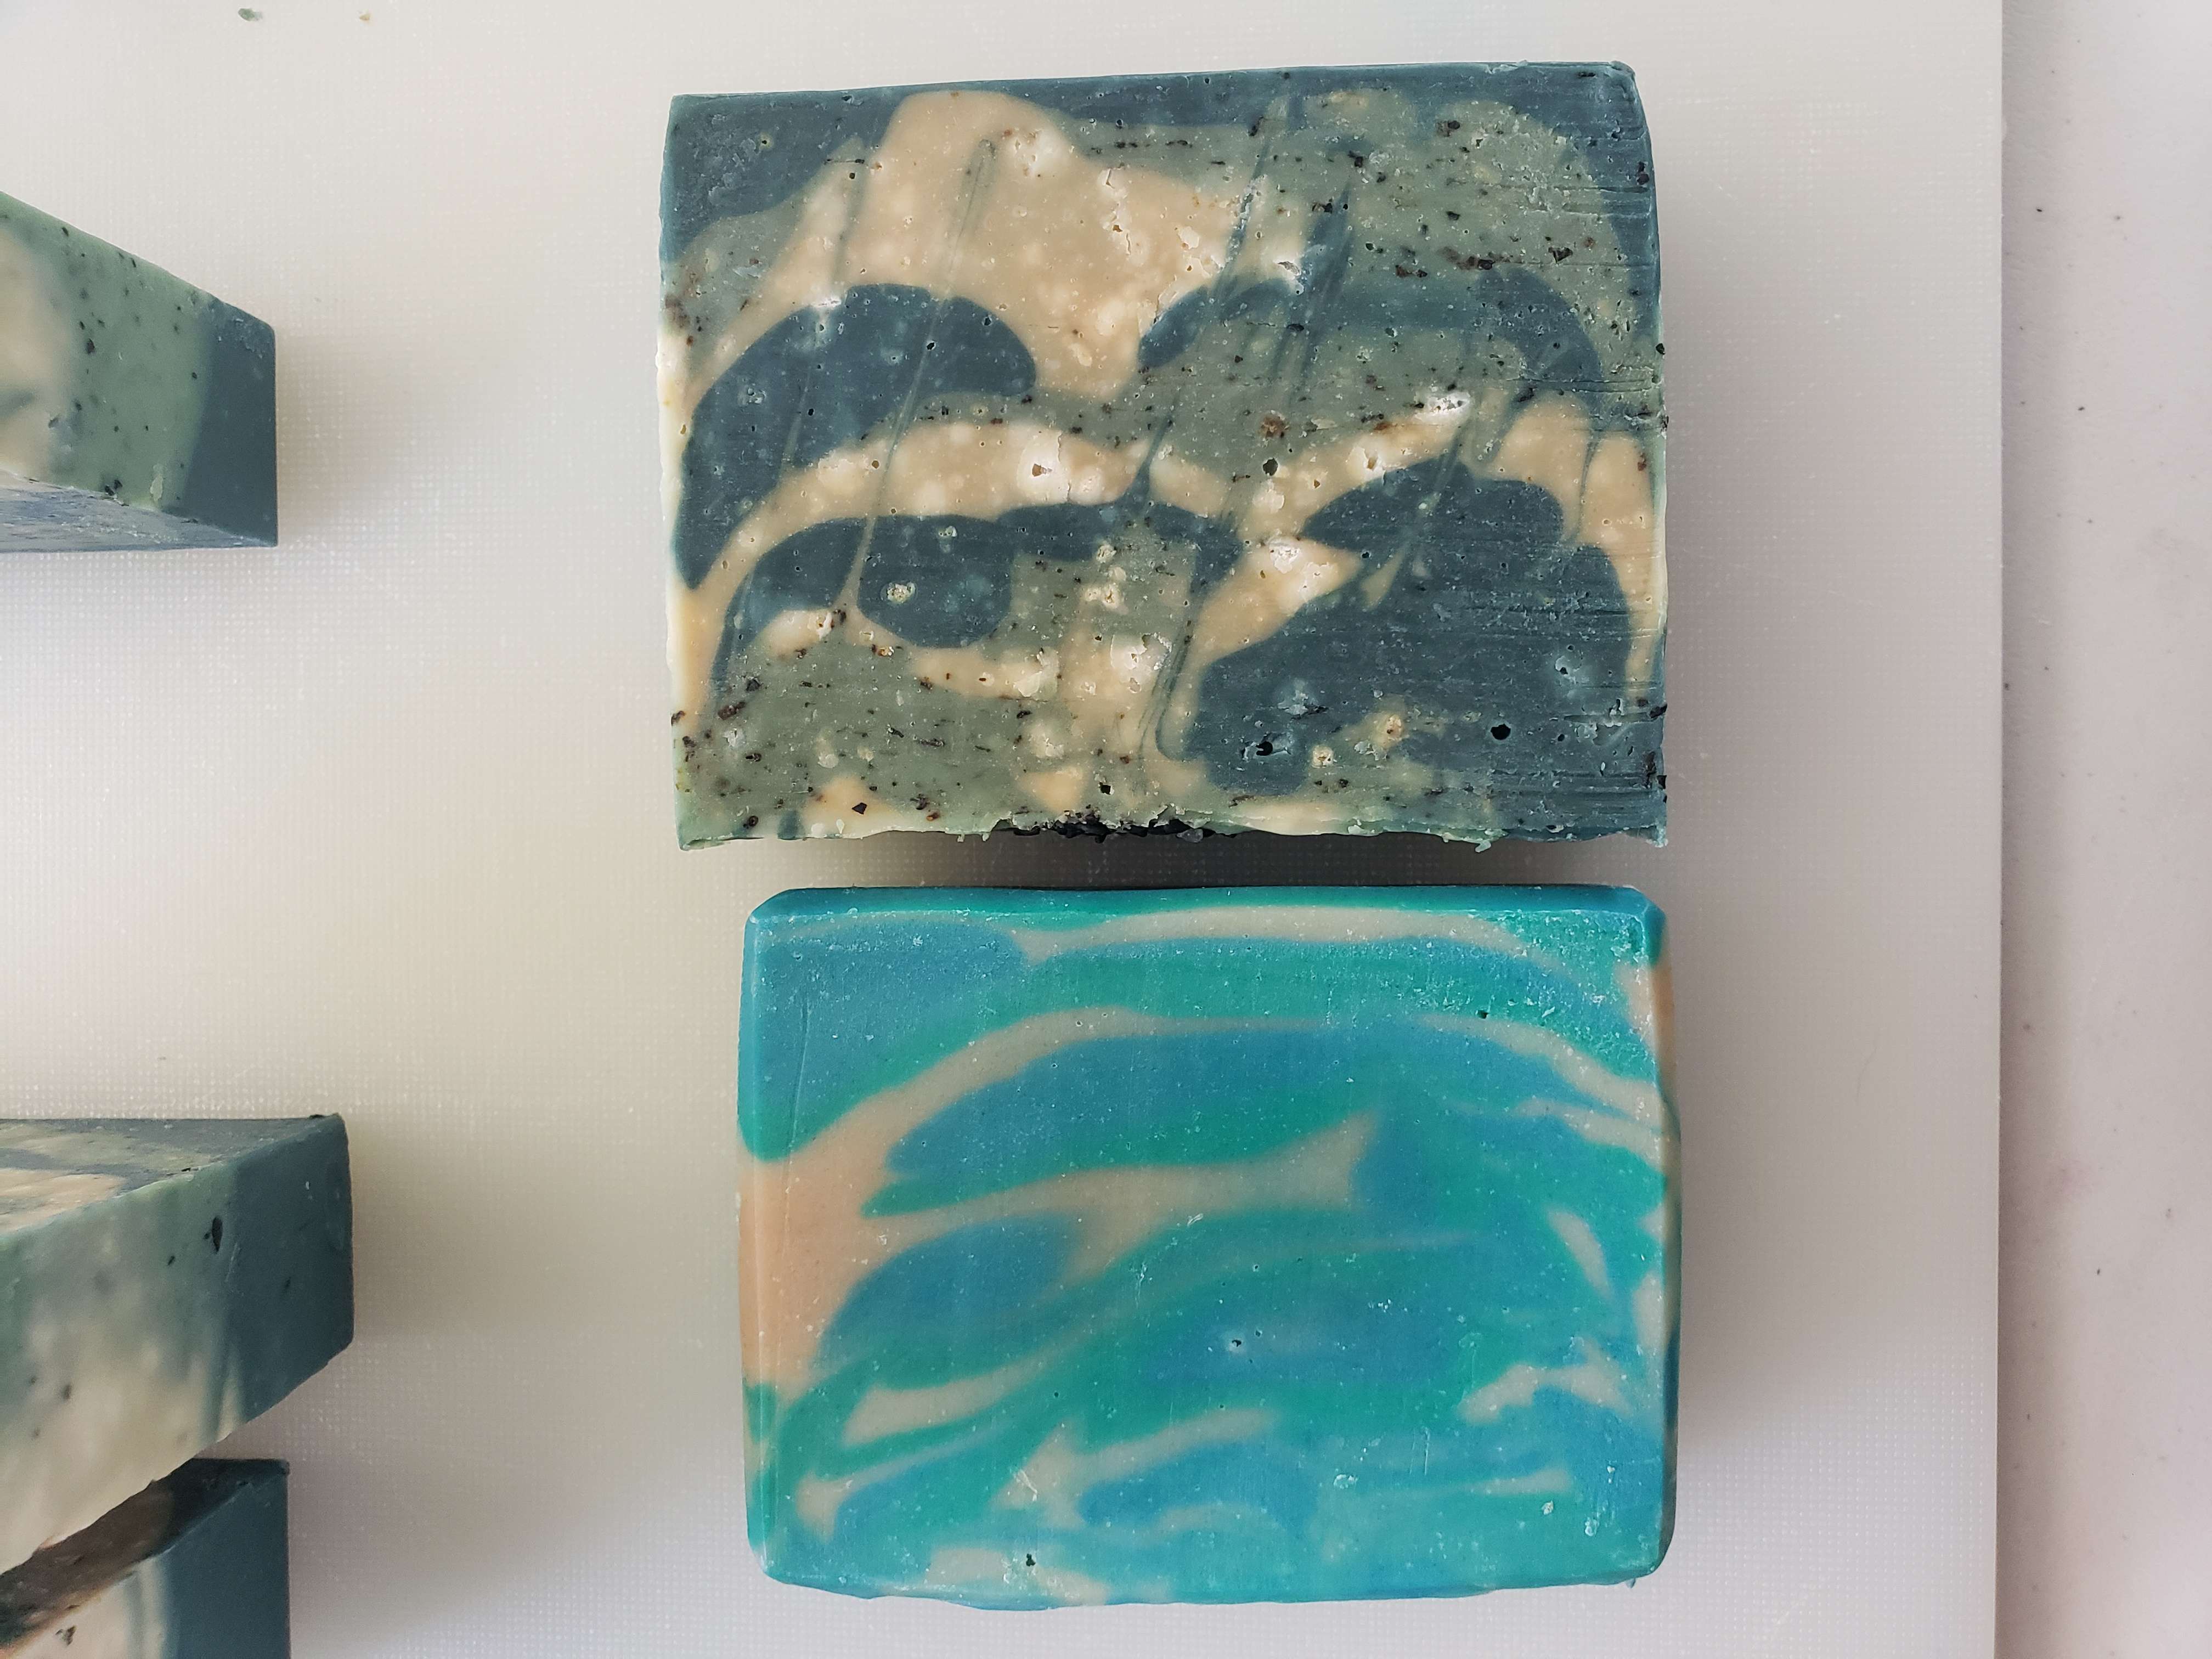
Next batch is unmolded and ready to go! I decided to experiment with """botanicals""" in the absolute broadest definition of the word as additives in my soap, as I've only used Coconut Milk Powder and Kaolin Clay up until now. This soap can also be considered either a double rice or a triple rice soap, I'm not sure which! It has two different kinds of rice water (rinse water with green tea brewed in it & fermented rice water) as well as sweet rice flour. No RBO because I noticed there was little to no difference in SoapCalc between the recipe with Avocado Oil and the recipe with RBO. Had one but not the other. Savin' money 😉

This batch is inspired by Chazuke, a Japanese dish.

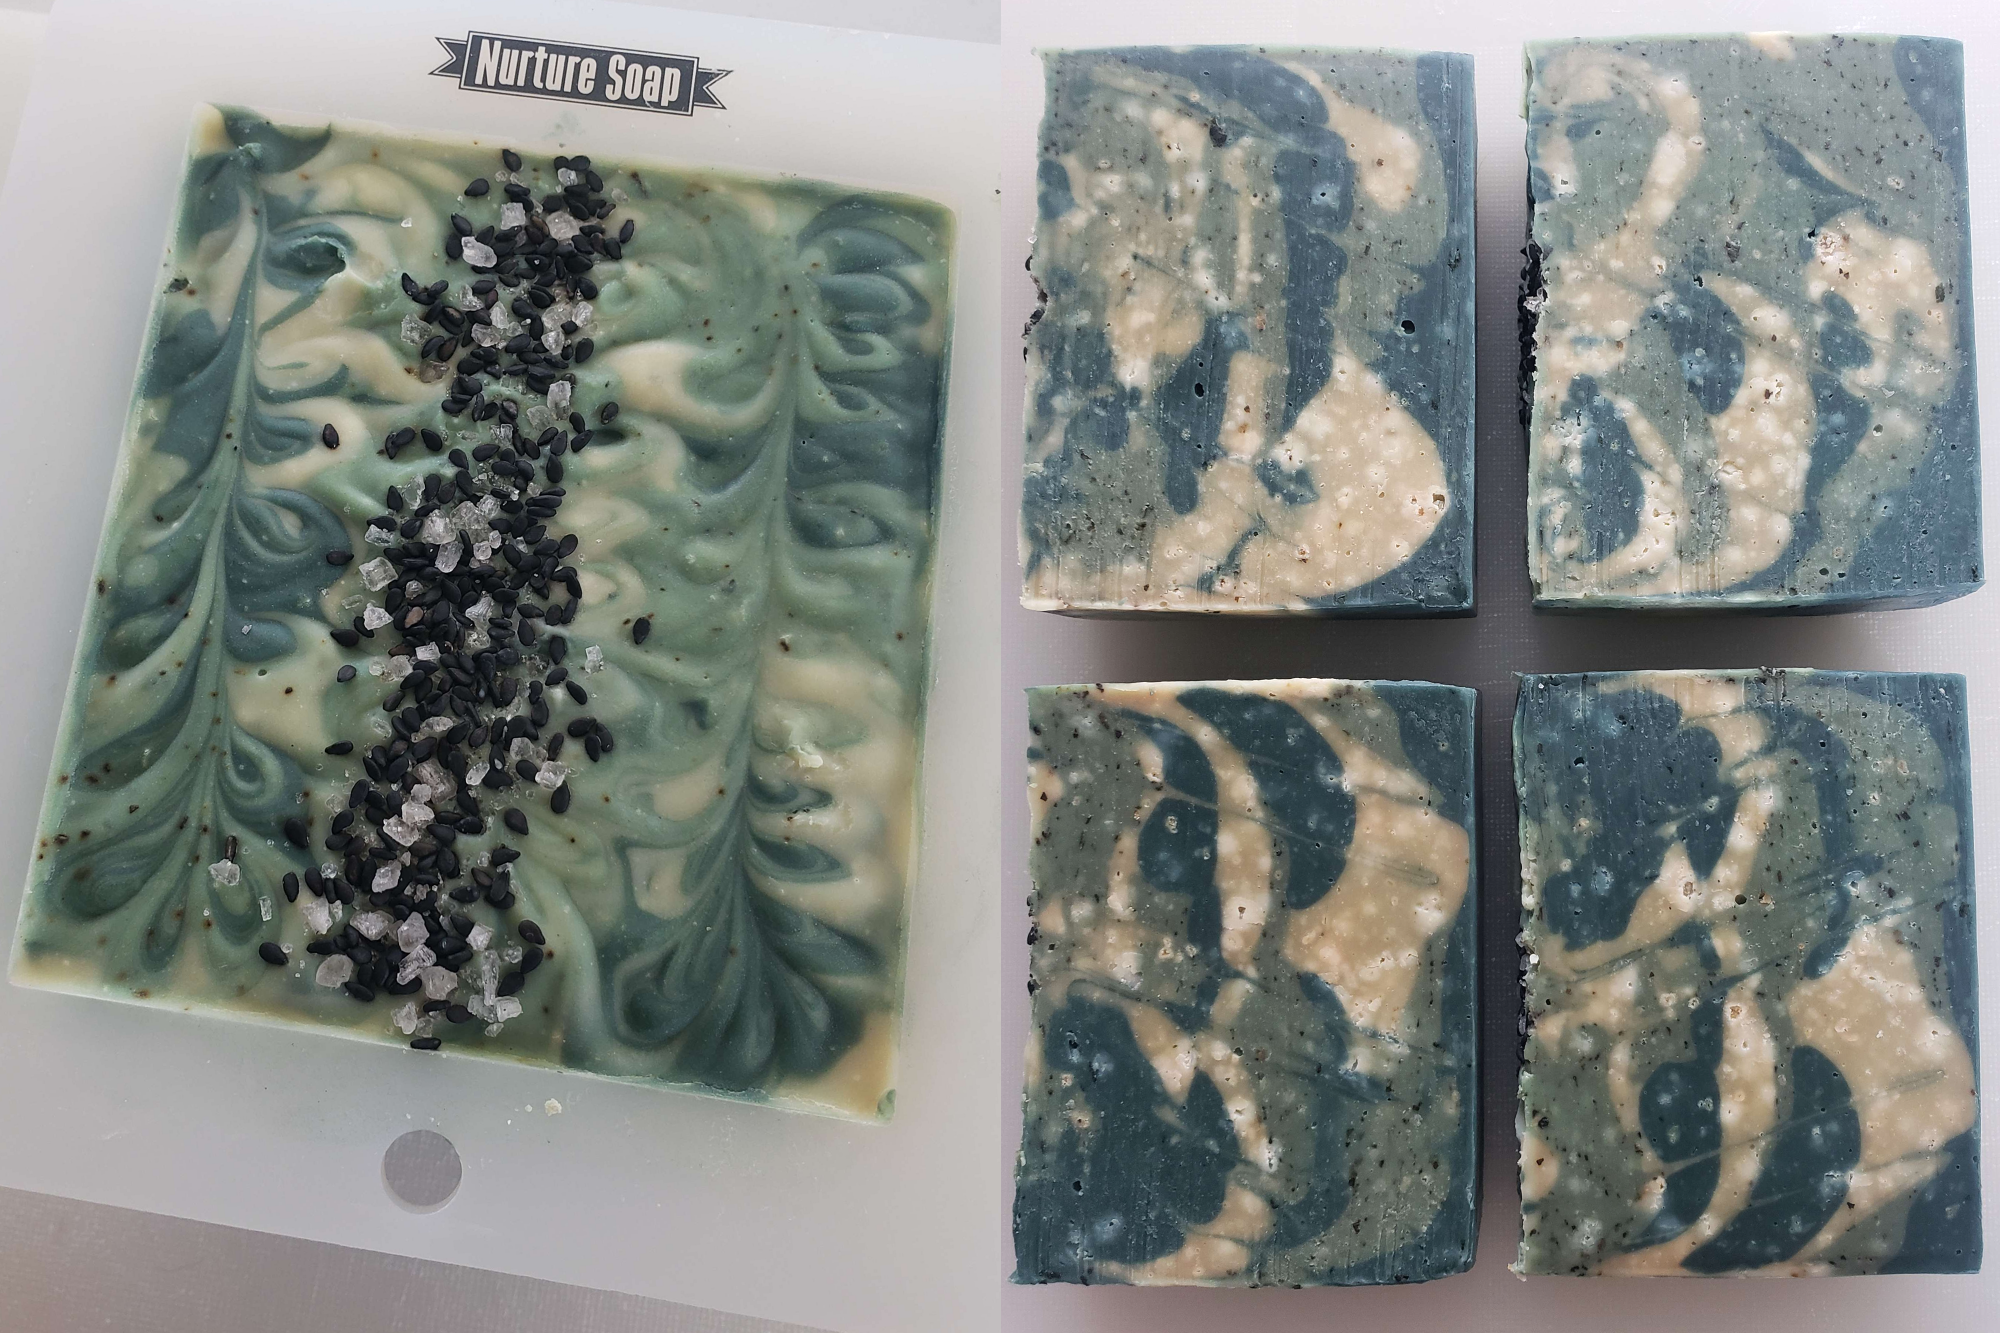
Batch #8 - 6 Oil Blend with Green Tea Infused Rice Water and Fermented Rice Water
osamus_chazuke.png

The good: Almost everything went really nicely with this batch. I'm not sure if the greens will fade to the greens on top of the bar or not, but I like them either way (can you tell I love green LOL) The nori, sea clay, and green tea I added mixed in very nicely. These bars feel really nice so I'm excited to try them out after the cure.
The bad: I added salt instead of sodium lactate and it did not dissolve in my lye solution... 😵 and I didn't have a strainer for my lye (didn't want to use the one in the kitchen and ruin it for future food use...) Most of it ended up in the uncolored soap batter, so I think that's why there's that weirdness happening in the uncolored soap.
The ugly: I should've just left the soap alone without trying to swirl it. Oh well! NBD.
Lesson Learned: Use the dang sodium lactate dummy 😅


I also did my cure check for my first batch! The two bars I have left (two are being beta tested by family this week) both lost 0.5 oz over four weeks and it shows.
20221014_114430.jpg

Lather check showed a really nice feeling, creamyish lather (a very nice feeling blue lather LOL) that made me go "Oh, this is so soft." Not nearly as big bubbly as I expected from a 100% CO soap, but perhaps that's the soleseife in action. My hands felt very nice afterwards, clean but not tight. I don't really have any good frame of reference since I've never thought of it before, but I'm definitely not displeased. Eager to hear what my beta testers think.
 
The bad: I added salt instead of sodium lactate and it did not dissolve in my lye solution... 😵 and I didn't have a strainer for my lye (didn't want to use the one in the kitchen and ruin it for future food use...) Most of it ended up in the uncolored soap batter, so I think that's why there's that weirdness happening in the uncolored soap.
The soap looks beautiful! You have a great eye for design.

Regarding salt (or sugar, or anything else you need to dissolve), it's always best to add and dissolve those things before adding the NaOH. The NaOH is selfish and doesn't like to share the water. ;)

Also, you will not ruin your strainer for future food use by running lye solution through it. Lye solutions are often used for cleaning, and they are also used to create olives, pretzels, bagels, and more. Just give it a good wash when you are done, and return it to the kitchen. :)

Ah, thank you for the advice! I didn't think to dissolve it first because I was working with (r)ice I made last week and I had success the first time I tried adding salt to lye solution. But all soap batches are different. 😌

And aha! If I get a mix up again, I'll go steal my strainer. It was one of those moments where I was actively working on the soap and didn't want to stop, take off my gloves, leave my office, go find my phone, and google whether or not it was okay, and opted to just err on the side of caution 😂 It's just an oopsie bonus exfoliant instead. Totally intentional. 😉
 
Oh no, it seems like my photos might've broken already. I'll add them to this reply, since... I think my time limit has passed for editing. I'll make sure to use a more reliable host for future posts.

Good thinking. :thumbs:

I really like that combo. Anxious to see if the greens fade or not. Lovely.
Thank you! I'll be poking into my Fabulous Curing Room (an old bookcase in my closet 😂) ever so often to investigate any color changes. Both the inner and outer greens are so lovely that I can't complain.

No soapmaking today as I'm baking a cheesecake instead and I also need to get started on my November MP soaps. But I did decide to boil some beer to prep in advance for a beer soap attempt. Well. I got distracted for just a little too long and ended up making beer "caramel" instead. So now I have a bottle sitting out on the counter to go flat instead 🤭

Batch #1
Batch #2
Batch #3

Batch #4
Batch #5
Batch #6

Batch #7
Batch #8
 
Ah, what an adventurous batch this one was.

I purchased a tall skinny wooden loaf mold on Friday and received it yesterday. I'd originally planned on using my normal molds for this batch, but hey, it's here, so why not give it a shot. I've never used a non-silicone lined wooden mold before, so that was... very interesting haha. Unfortunately, I did get some leakage but I think that was inevitable ;) It just meant my soaps are a little more of a parabola than intended.

Jeez and I also totally underestimated how much soap goes into one of those things while pouring so I had a bit of overflow that wasn't part of the design. It's totally fine though, because now I have those cute little splattery bars that I can give to some of my friends who are asking why I'm not selling (I must make it clear to y'all that I sell MP soaps 🤣) all these pretty bars I keep showing them.

Another new thing I tried was adding my FO/Kaolin directly to the oils before adding lye. And used a bar cutter! And attempted to use a mandolin to plane my two end pieces (1 to reveal a side of soap that actually has the design I wanted and 1 to make a little sample bar for me to do my cure testing on later). I have a lot of extra scraps with this batch and I still have more FO, so maybe I'll make another Ciaglia batch in the near future.

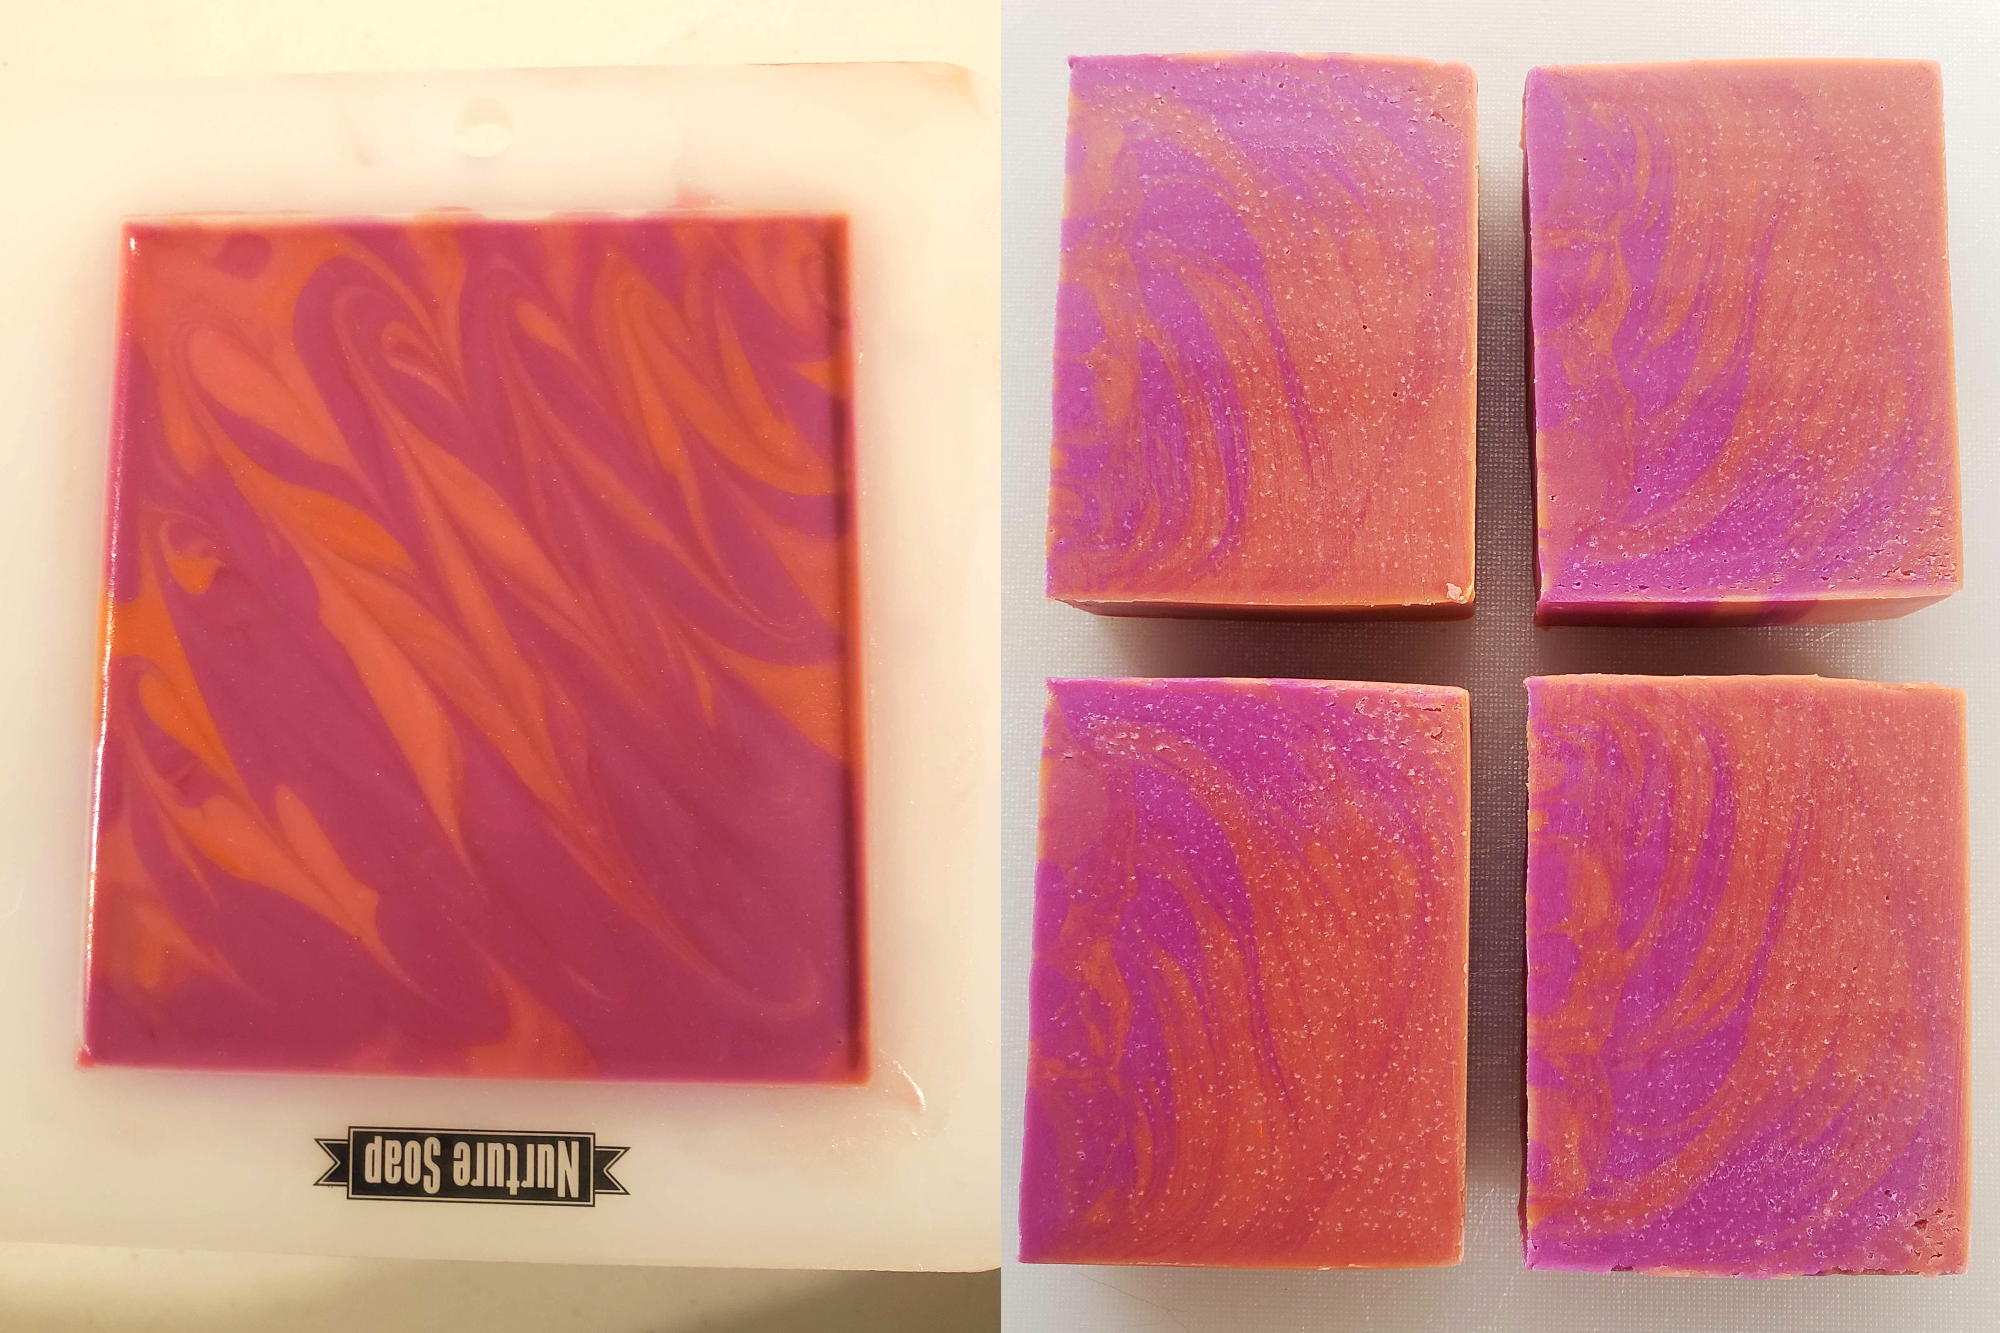
Batch #9 - 4 Oil Blend with Cherry Hard Seltzer (with 2g added sugar, since this one was sugar free)
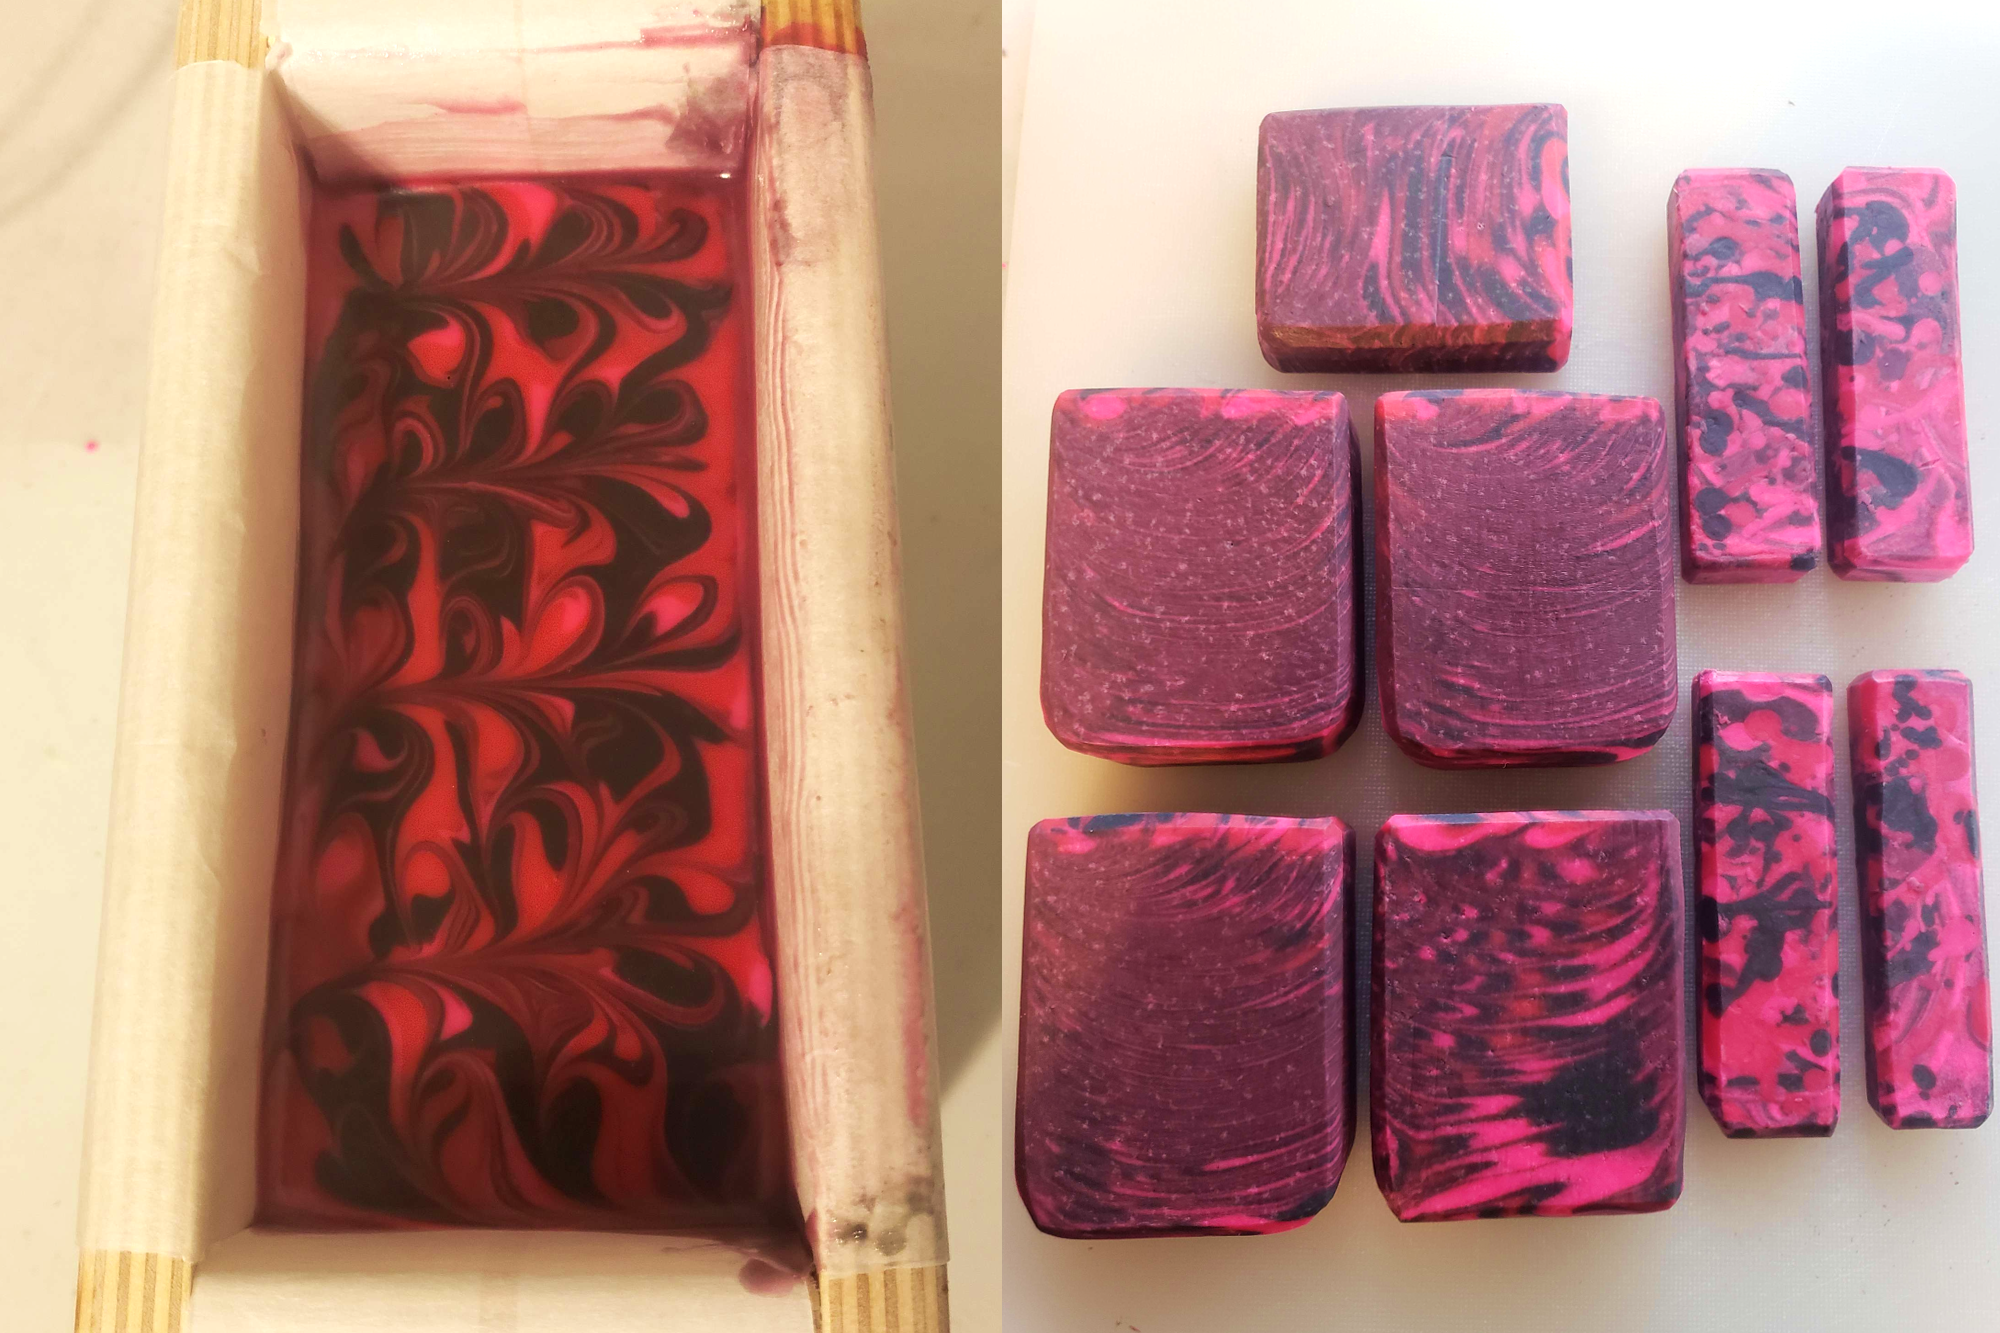
cherry.png

The good: I had an absolutely beautifully thin batter which made mixing colors an absolute dream.
The bad: ............and I then proceeded to jump the gun and pour too soon. haha. On the bright side, that dark pinky burgundy color is gorgeous so happy accidents? Definitely not my intended design, but it's still giving the Black Cherry vibe of the FO.
The ugly: This one ashed badly in the mold 😔 It's not a big deal to me ultimately since I know it's largely a product of my climate, but this one was a bit scuzzy. At least it will wash off 😌
Lesson Learned: If you're gonna make a batch that accidentally gets muddy, make sure the colors mix well 😜 Plan ahead. Kidding, of course. The true lesson is patience. I cannot wait to fail that lesson over and over again. 😂


In other soaping news, I got wonderful feedback from my family members about my first batch. Very happy with that and hope they continue to let me know how it goes ✨ I did a test of my second batch today and I don't like it as much (it's still fine and my hands felt nice afterwards but the 100% CO felt much nicer) however, there was a lot of water in that batch so maybe I'll have better results during my next cure check.

Next on the list is beer soap!
 
I've never used a non-silicone lined wooden mold before,
Check YouTube for "How to Line a wooden Mold"
I also totally underestimated how much soap goes into one of those things
Weight of oils X a factor of 1.37 = weight of soap (approx.)
Mold supplier can tell you how much soap the mold holds.
Another new thing I tried was adding my FO/Kaolin directly to the oils before adding lye.
:thumbs:
The true lesson is patience.
:nodding:
 
Check YouTube for "How to Line a wooden Mold"

I looked at a few of these before lining it but it seems the method I chose was a leaker 😂 That or it was just beginner's failure. It happens~

Weight of oils X a factor of 1.37 = weight of soap (approx.)
Mold supplier can tell you how much soap the mold holds.

I did have the proper soap batter amount, but I did an acrylic-style pour where I put the batter in a clean bowl and then poured from there. I didn't fill that enough because I said to myself, "this is plenty! I'll have just enough left to make a little soap on a rope tester"

20221018_184110.jpg


(spoiler alert: he had too much left aside 🤣)
 
Unfortunately, I did get some leakage but I think that was inevitable ;) It just meant my soaps are a little more of a parabola than intended.
In case you haven't seen this yet, there is a very easy way to fold freezer paper to make a tight-fitting, rectangular mold liner that prevents both leaks and that parabola shape. This video is pretty good (I just grabbed it from a mix on YouTube because it was shortest and clear).

Since the maker had done one before, she doesn't explain that she uses paper about 10 - 12 inches wider than mold and cuts it that same length longer so she has extra to fold over and tape down as she finishes.

Hope this is useful to you or others.
You know, I think this was the lady who I watched, but it might've been her other video with a different method (maybe?)

I'll give this method a shot next time :) Thanks!
 
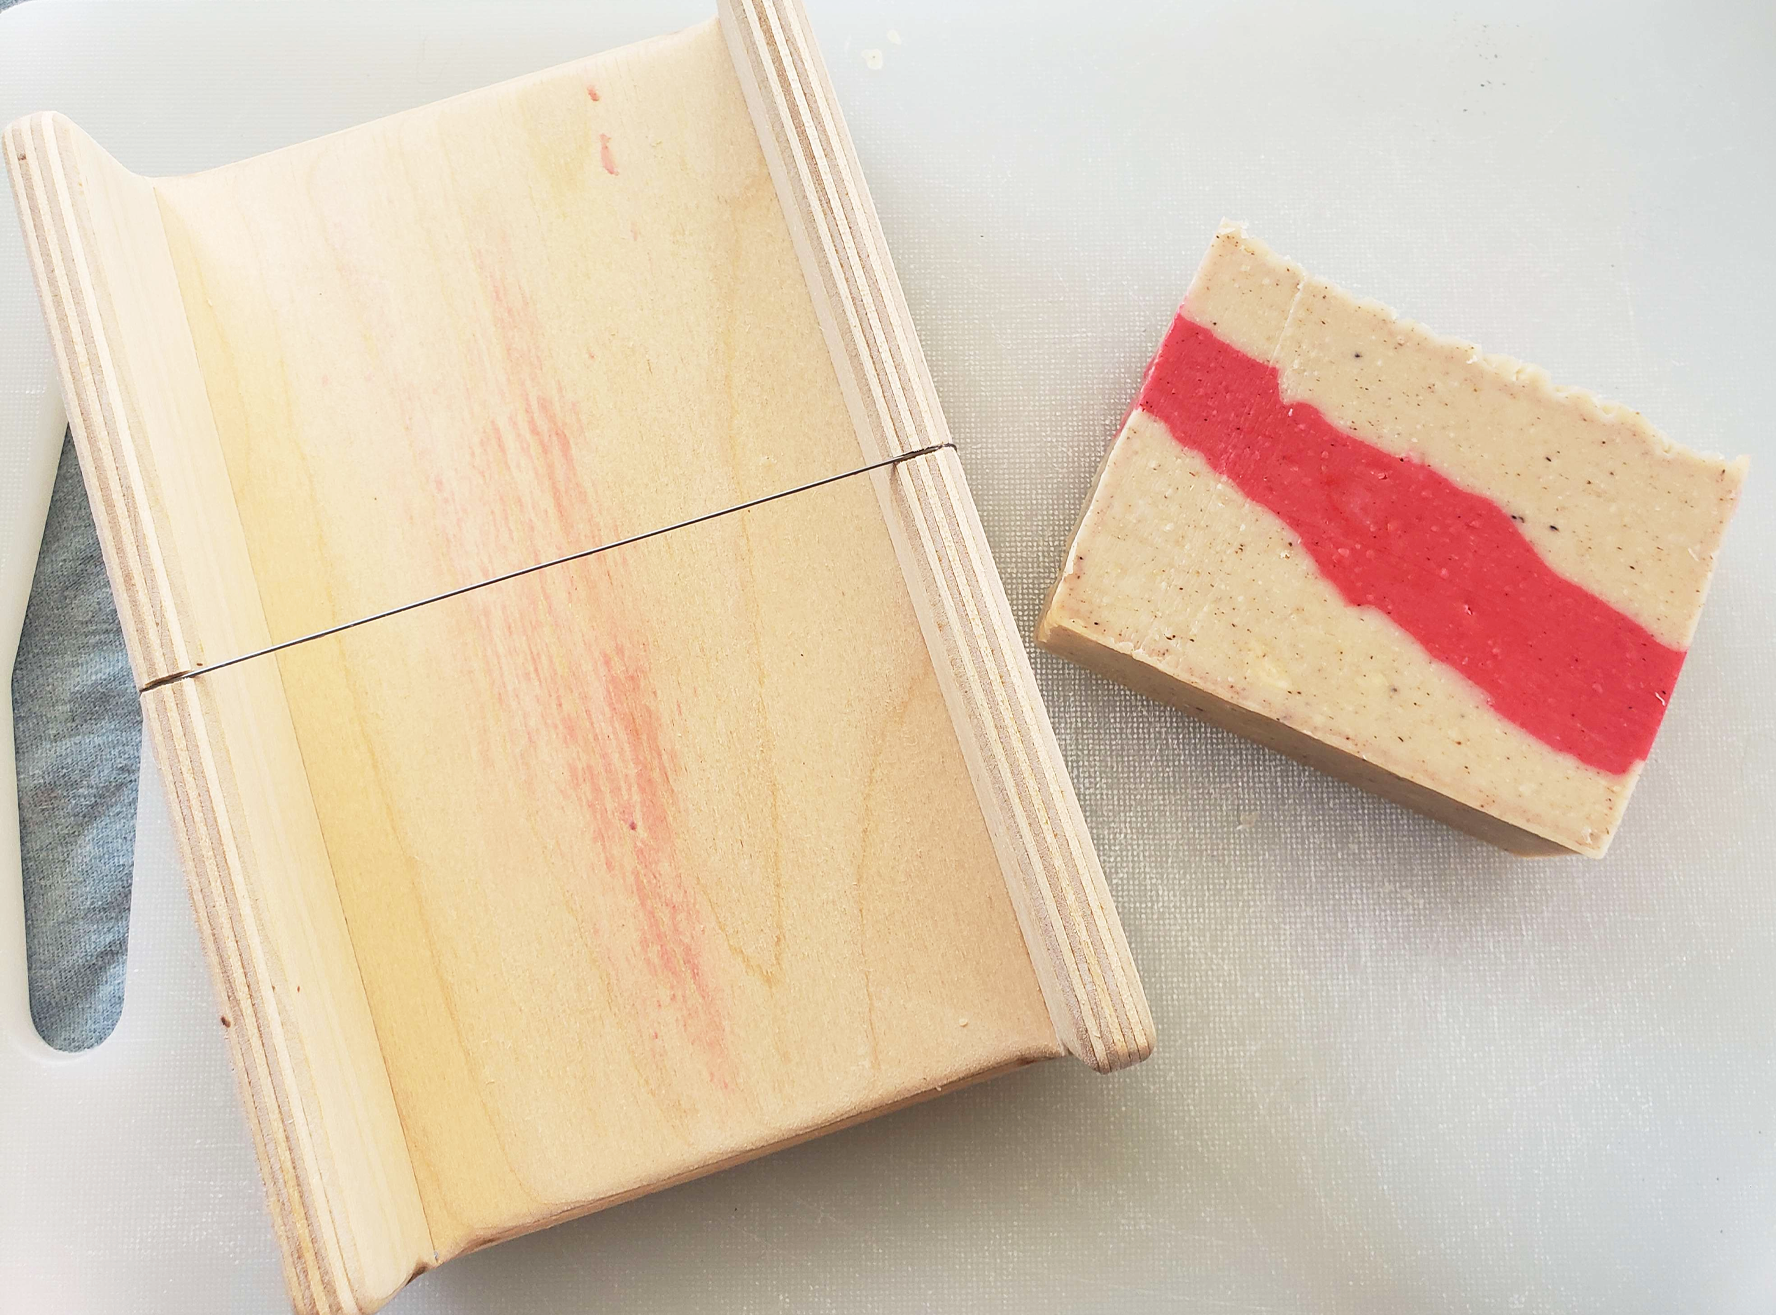
The beer soap has emerged from its comfy old shirt cocoon!

I did not use my new TS mold (but rather the SC mold, of course, meaning the "short and chunky" mold 🤣) but I do have it lined and ready for a batch more suitable for it. And I'm quite glad I did use the ol' SC, because I'm not sure I would've gotten this batter into a TS in the first place LOL.

The FO blend I made has two FOs that discolor to tan and I only had a marginal amount of white mica left that would've done next to nothing. So in order to see the beer's natural color and to see how the discoloration progresses, I left it uncolored. My accent color was a mix of Firecracker Red and Neon Red from NS. I ran out of Firecracker in the process and I have a few other micas that are looking a little empty, so I'll be picking up Trial by Fire on my next NS order 🔥

I also added some freshly ground nutmeg. I read on here that spices felt scratchy in soap and well, instead of heeding caution I decided to give it a try. Worse case scenario I know at least 3 beer drinkers who could rub sandpaper on their skin and still come out fine. So, surprise! Christmas gifts 🤣

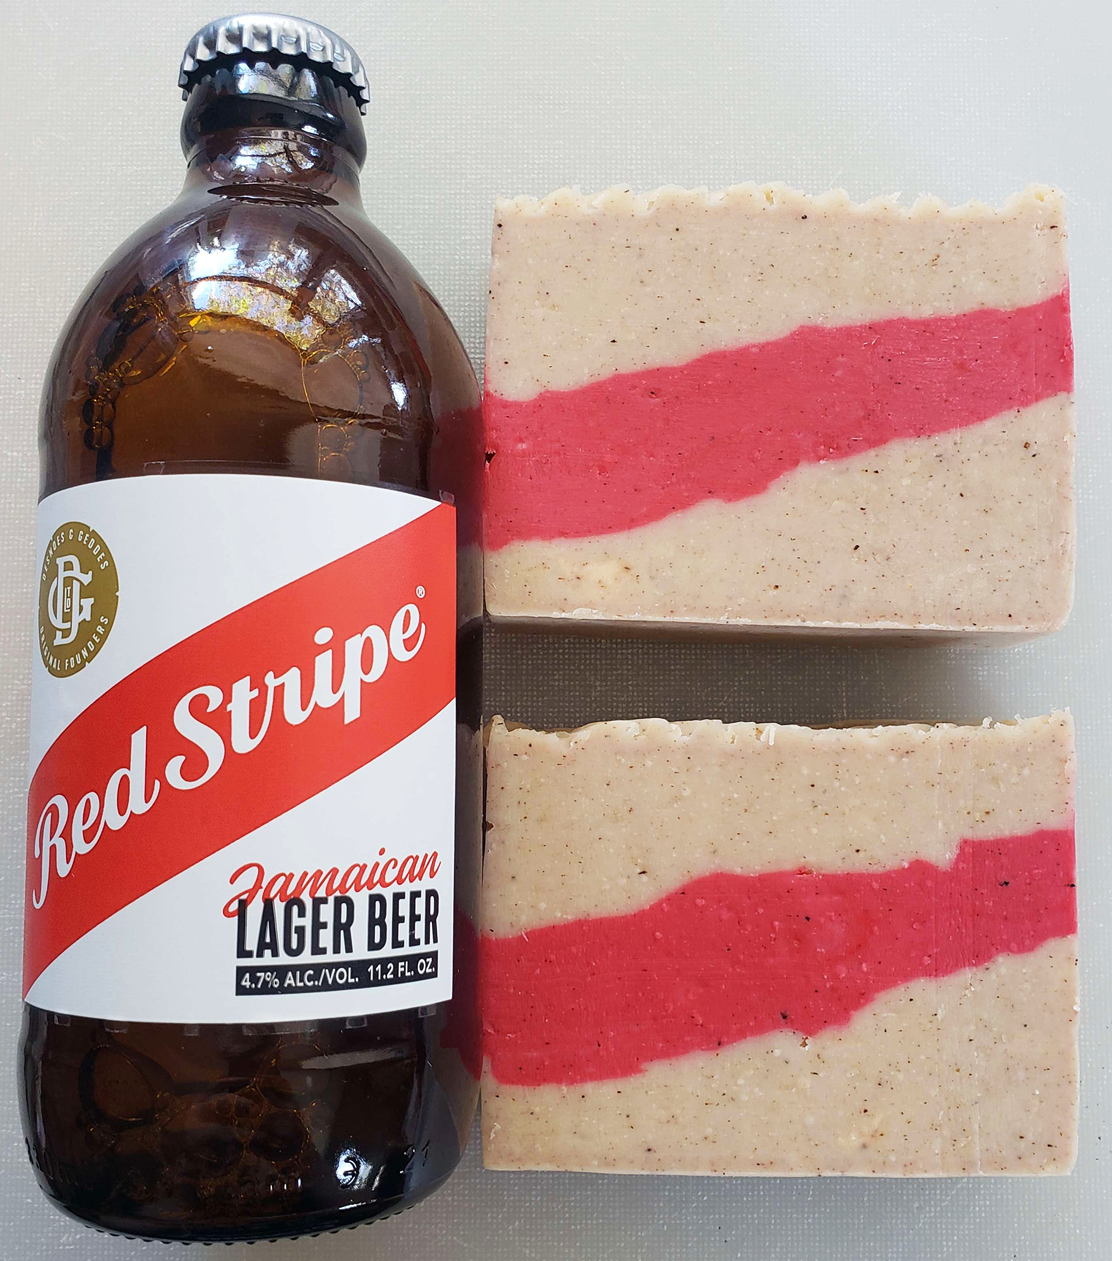
Batch #10 - 6 Oil Blend with Red Stripe
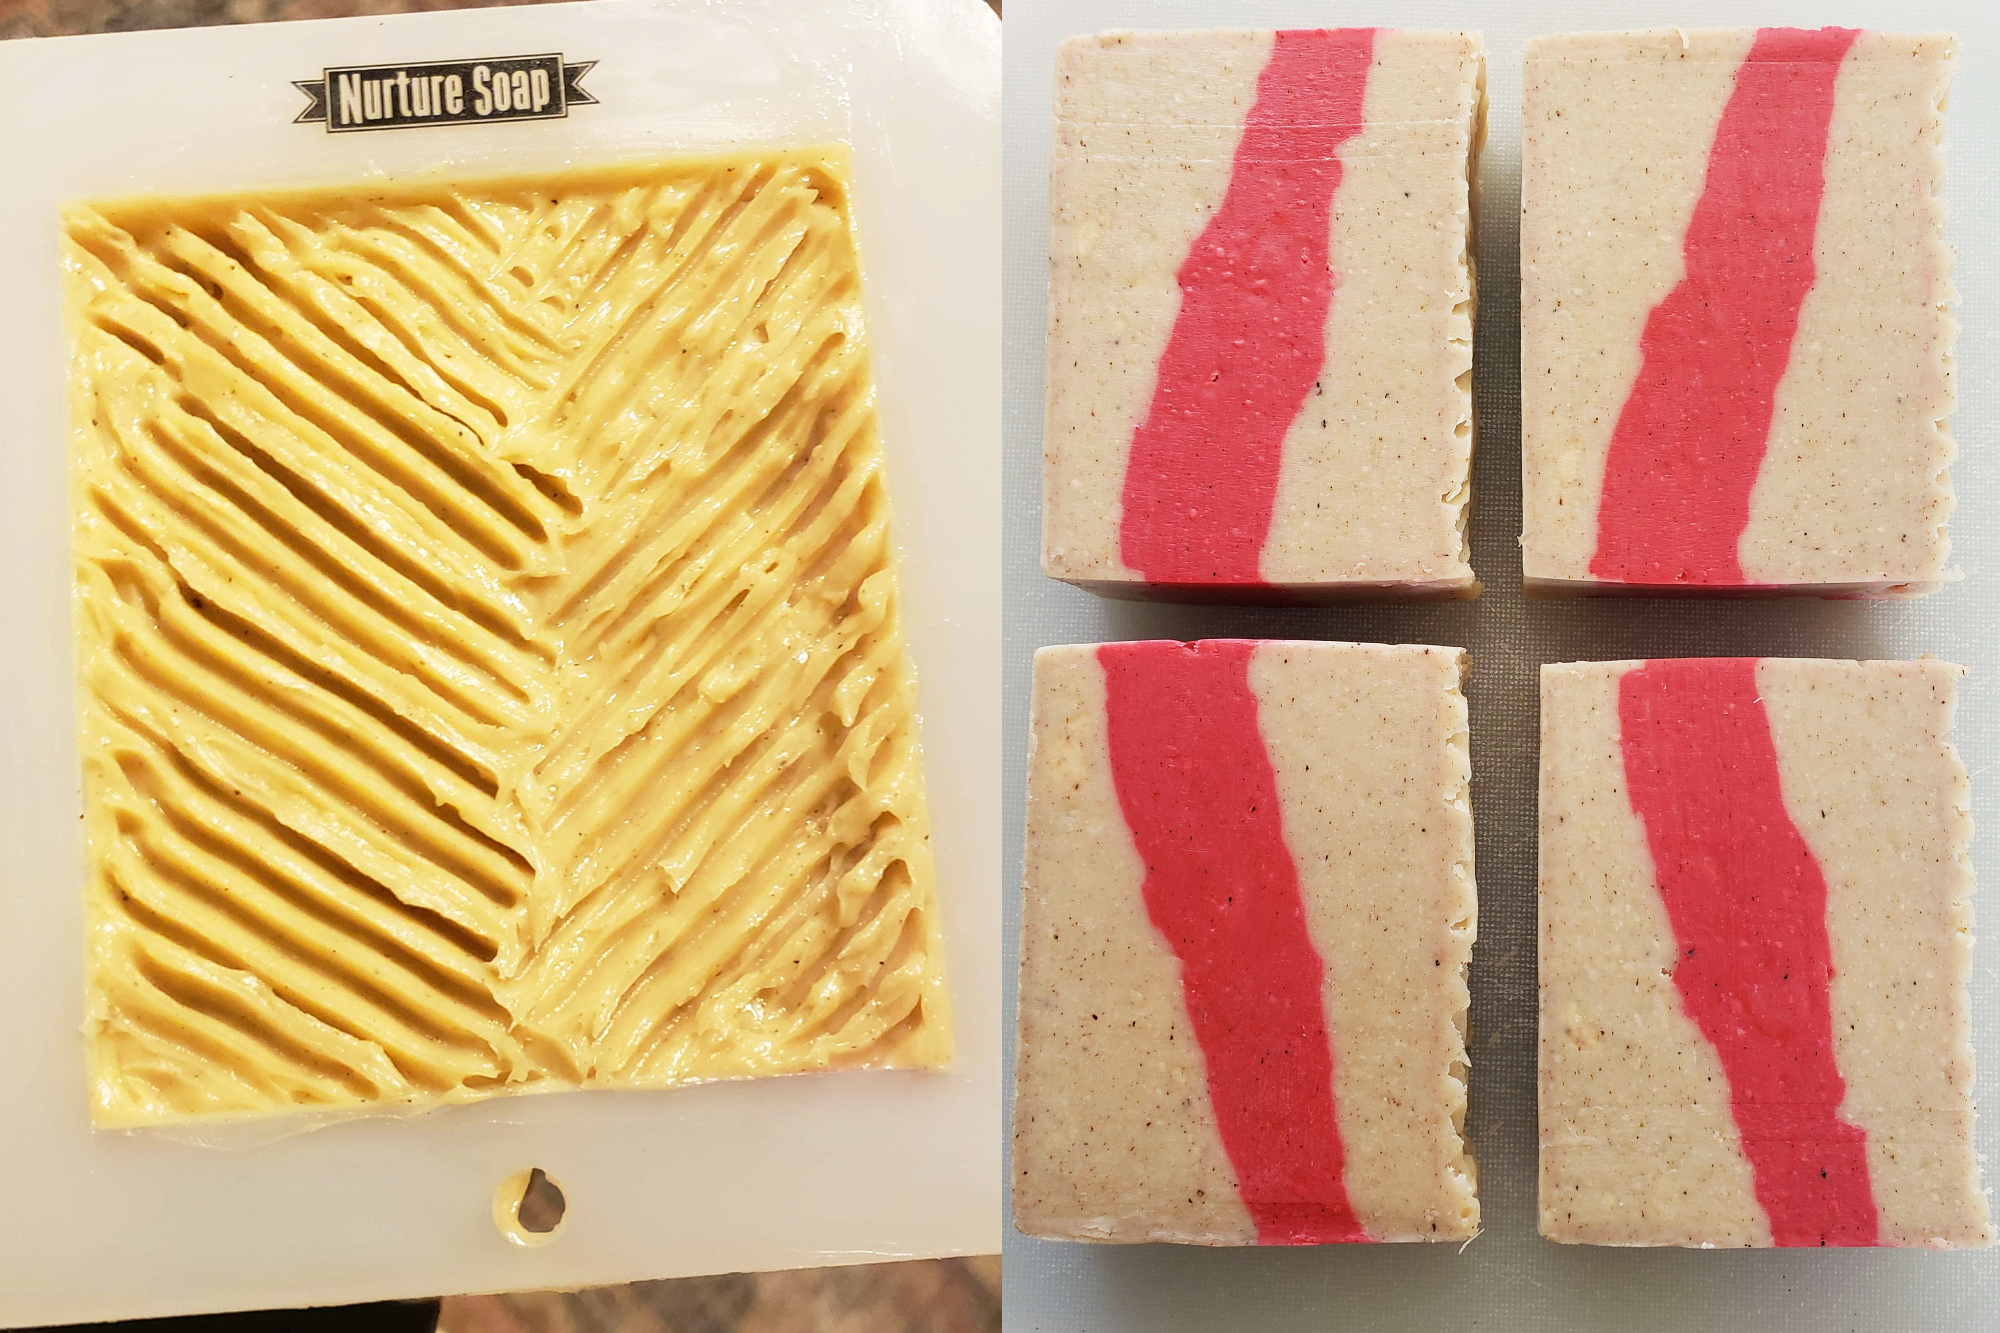
red_stripe.png

The good: Everything went just fine and I had an enjoyable time making it. Even the experience of smearing that thick thick batter into the mold was fun.
The bad: I don't have a single complaint really. Yeah, it accelerated but that was expected and helped make layers easily.
The ugly: The edges are a bit holey 👼 but with batter just shy of peanut butter, I have no issues with that.
Lesson Learned: Always expect the unexpected, but also expect the expected 🧙‍♂️ That was your daily wisdom from me, Confused-cius.

The design inspiration:
New_Canvas5.png


And this was my second time using my single bar cutter and I'm very pleased with it. It's definitely a lot easier than dealing with a knife for CP.
New_Canvas6.png


Now I'm at a bit of an impasse, as I'm not sure what to try next and have used all the FOs I bought specifically for CP. So maybe I'll take a break while things cure or maybe I'll stare at my FO collection until an idea comes to me.

I do have one idea, but the two FOs I have that would "work" for it are both misbehaviors (thank goodness for MP) so I'm not sure I want to willingly do that. One is an "extreme" ricer and the other is a "moderate" accelerator.
I love that you used Red Stripe! Your soap looks nice.
 

Latest posts

Back
Top