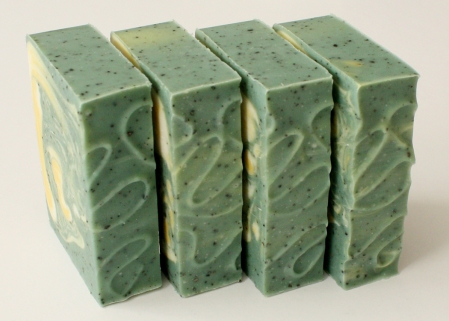
I hear ya, dibbles. I made one attempt but my batter thickened too much and I got a stamp instead of an inverted stamp. Planed those tops off so I'll be trying again, and again, and again.....:lolno:
You are using an out of date browser. It may not display this or other websites correctly.
You should upgrade or use an alternative browser.
You should upgrade or use an alternative browser.
SMF Soap Challenge August - Inverted Stamping
- Thread starter Saponista
- Start date

Help Support Soapmaking Forum:
This site may earn a commission from merchant affiliate
links, including eBay, Amazon, and others.
My first attempt. Batter was too thin. Then, when I was taking the photo, I dropped the stupid biscuit cutter in the batter! But, it's fun. I'm debating whether I want to go with my original plan of just using things I have around the house (mostly circular objects) or buying some wire to let my "artist" out. I have a HUGE roll of wire. Unfortunately it is aluminum. Grrrrrr!


SunWolf
Well-Known Member
To those of you that only have regular wire on hand, you could always bend your shapes, then coat the wire with a couple coats of nail polish to seal the surface. The polish should withstand the soap batter if not left in it to sit. Just dipping should be fine.
tbeck3579
Well-Known Member
I just finished making my first salt soap and on one of the individual soaps I used a wire to see if I liked the design, just a test. I like that the salt soap makes the design stand up a little more, making it more noticeable. That's the good news. The bad news is, I'm not sure if the soap itself is going to turn out? Having never made salt soap and reading that it traces and sets fast I may not have mixed it enough. It went to trace after a few short bursts with the stick blender. When I lifted the stick blender the peaks were already forming on the top and not disappearing. I thought it would set and I wouldn't be able to poor if I didn't move quickly. I added the salt but I may have done that too soon... I guess I'll find out in a few hours...
Saponista
Well-Known Member
If it hasn't separated, I think you'll be fine.
That's a good idea SunWolf. I really don't want to buy more wire that I'll probably never use again...

$18.89 ($1.18 / Ounce)
Extra Virgin Coconut Oil Cold Pressed Carrier Oil for Essential Oils Mixing & Soap Making Supplies
Soapeauty

$35.74 ($0.32 / Ounce)
Nature's Oil Coconut 76 Degree, Naturally Refined, 7lbs (1 Gallon)
Bulk Apothecary

$13.12 ($0.41 / Ounce)
$14.97 ($0.47 / Ounce)
Golden Barrel Butter Flavored Coconut Oil (32 oz.)
JF Distributions

$119.74 ($0.21 / Ounce)
Nature's Oil Coconut 76 Degree, Naturally Refined, 35lbs (5 Gallon)
Bulk Apothecary

$56.99
$69.99
WALLACE & WILLIAMSON DIY Soap Making Kit with Melt & Pour Base, Cutting Box, Molds, Fragrances, Flowers Silicone Molds - for Adults & Kids Craft
Wallace & Williamson

$37.95 ($0.34 / Ounce)
COCONUT 76 Oil. Soap making supplies. 7 pound Gallon.
Traverse Bay Bath And Body

$26.24 ($0.33 / Ounce)
$32.00 ($0.40 / Ounce)
Primal Elements Triple Butter Soap Base (Mango, Shea, and Cocoa Butter) - Moisturizing Melt and Pour Glycerin Soap Base for Crafting and Soap Making, Vegan, Cruelty Free, Easy to Cut - 5 Pound
Amazon.com

$69.97
$79.99
Illumive Deluxe Soap Making Kit - Large Soap Making Kit. Includes All Soap Making Supplies. DIY Soap Making Kit.
Novarbee

$16.39 ($1.17 / Fl Oz)
Nutiva Organic Coconut Oil with Butter Flavor from non-GMO, Steam Refined, Sustainably Farmed Coconuts, 14-ounce
fenvy

$8.62
$17.99
The Natural Soap Making Book for Beginners: Do-It-Yourself Soaps Using All-Natural Herbs, Spices, and Essential Oils
Amazon.com
Looks good TeresaT!
TVivian
Well-Known Member
But they look beautiful!
PinkCupcake
Well-Known Member
- Joined
- Jul 26, 2013
- Messages
- 579
- Reaction score
- 351
My first attempt. I used these small daisy, fondant cutters. It was hard to get them to dip in evenly and then because they're sealed through the centers, the would suction up the soap batter when I'd lift them up.
I have those same cutters! I might try a batch using those, too.
Saponista
Well-Known Member
They are lovely, I really like the effect you got!
gigisiguenza
Well-Known Member
- Joined
- Jul 11, 2015
- Messages
- 1,391
- Reaction score
- 917
My first attempt. I used these small daisy, fondant cutters. It was hard to get them to dip in evenly and then because they're sealed through the centers, the would suction up the soap batter when I'd lift them up.
View attachment 15796
View attachment 15797
Oh Teresa, that's so friggin pretty! I love the way that looks. How far into trace did you have to be to get such clean pulls?
ETA this was supposed to be directed to Tvivian but autocorrect struck again and I only just now noticed the error LOL
Last edited:
Saponomancer
Professional Geek
Oh wow that looks really great!
I'd call that success!! Very pretty!
tbeck3579
Well-Known Member
If it hasn't separated, I think you'll be fine.
You were right! I cut it this morning and it was fine. It took the usual amount of time. I was worried because many people said salt soap gets hard fast, and mine didn't get hard fast. It sure traced VERY fast though. I kept sticking my fingers in the test bars that had the inverted design to test for setting/hardness. Those bars aren't very pretty now... But the inverted design did hold the pattern nicely and seemed to me more pronounced in salt soap vs. regular soap.
aprice522
Well-Known Member
- Joined
- Oct 9, 2009
- Messages
- 111
- Reaction score
- 56
Beautiful, question though, I am new to swirls/soap and wondered what type of swirl is used on this I love it and would love to try this look for a pine scent I have planned!
Saponista
Well-Known Member
Are you talking about the inside of the soap or the top? I can't really see the inside well enough to tell you what kind of swirl it is, but it just looks like some kind of drop swirl maybe?
tbeck3579
Well-Known Member
Beautiful, question though, I am new to swirls/soap and wondered what type of swirl is used on this I love it and would love to try this look for a pine scent I have planned!
Aprice, the wire in the picture I posted above this picture (showing a hair pick and swirled bent wire) is what she used. The name of the soap is "Cool Citrus Basil". I didn't immediately see the recipe but it could be on her blog??? Her blog is VERY good; a very talented individual, and very generous about sharing how she does things. If you have questions I think she will answer. Here is her blog:
Jennifer's Handmade Soap (click here)
tbeck3579
Well-Known Member
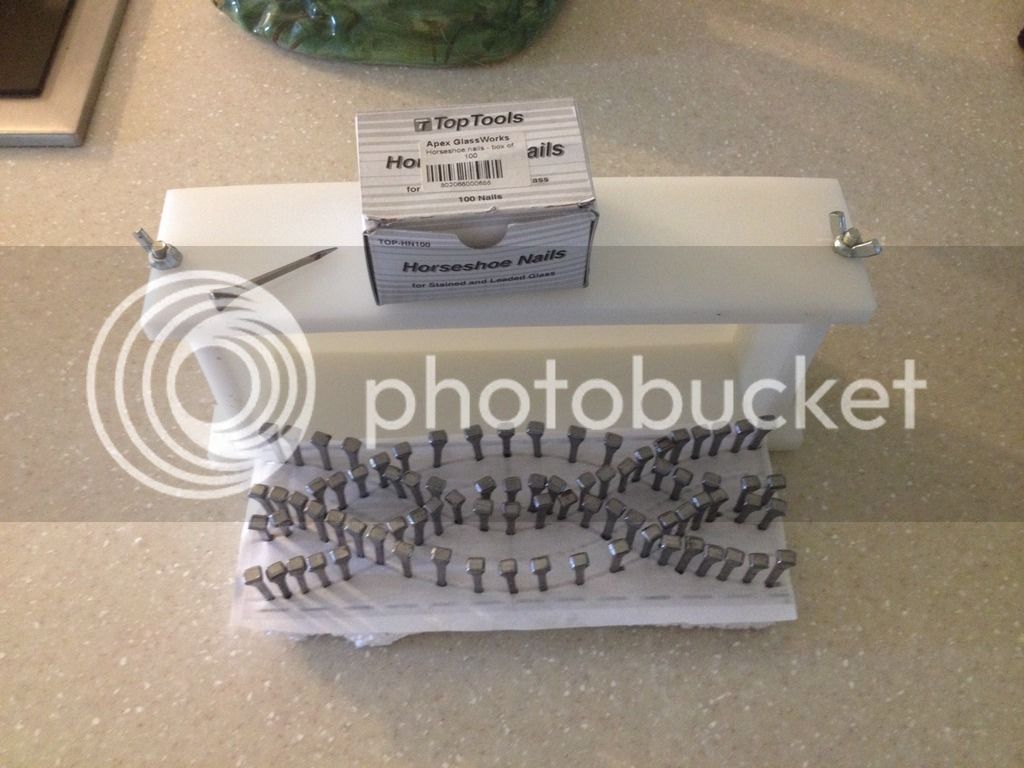
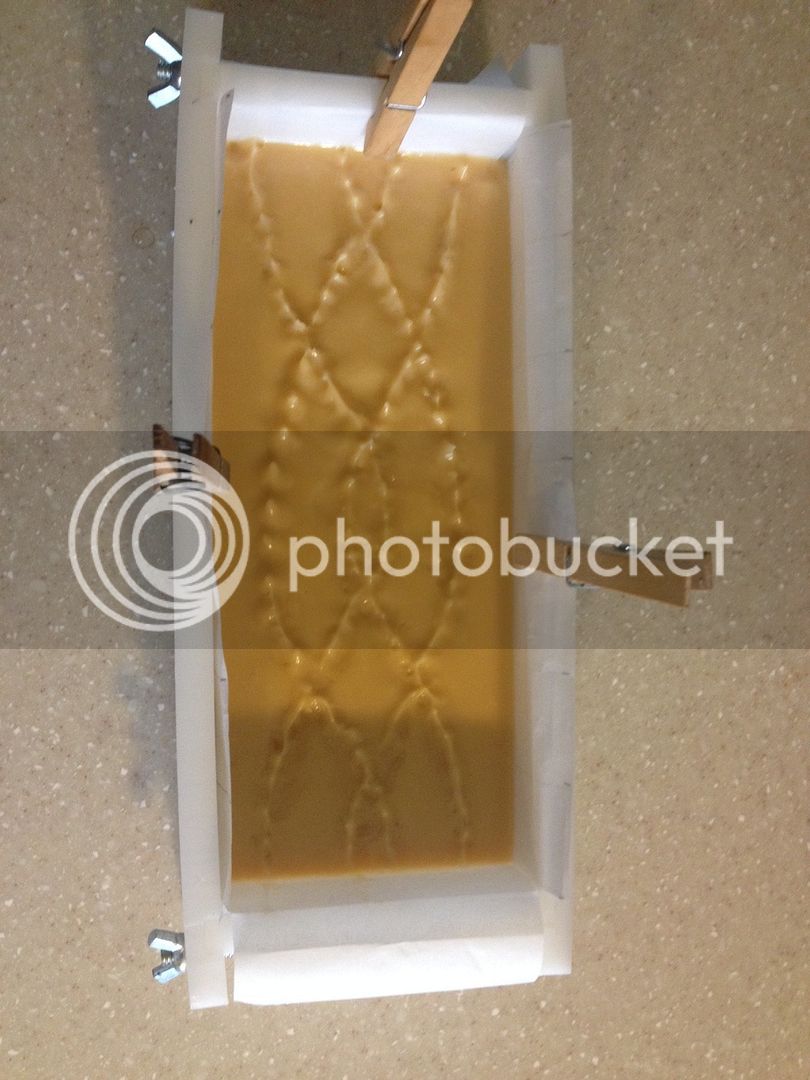
I wanted to do something a little more rustic, and not a perfect outline. While I was rummaging through wire and such I looked over at my stained glass work space and saw the nails. I then saw the Styrofoam, and thought, hmmm that could work. It worked well for what I wanted. Very easy to create any design you want. Put a printed picture of your liking on the Styrofoam and begin pushing nails -- a few minutes later you have a design. I put a fair amount of work into the top of my bar so I wanted that to be the top. I filled the mold at 1 1/2" and will cut accordingly. I'll only get a few bars by cutting it that way, but that's okay.


Saponista
Well-Known Member
That is so cool, love it!! Such an ingenious idea 
Similar threads
- Replies
- 20
- Views
- 1K
- Replies
- 25
- Views
- 2K
- Replies
- 187
- Views
- 8K
- Replies
- 24
- Views
- 2K
- Replies
- 158
- Views
- 8K


