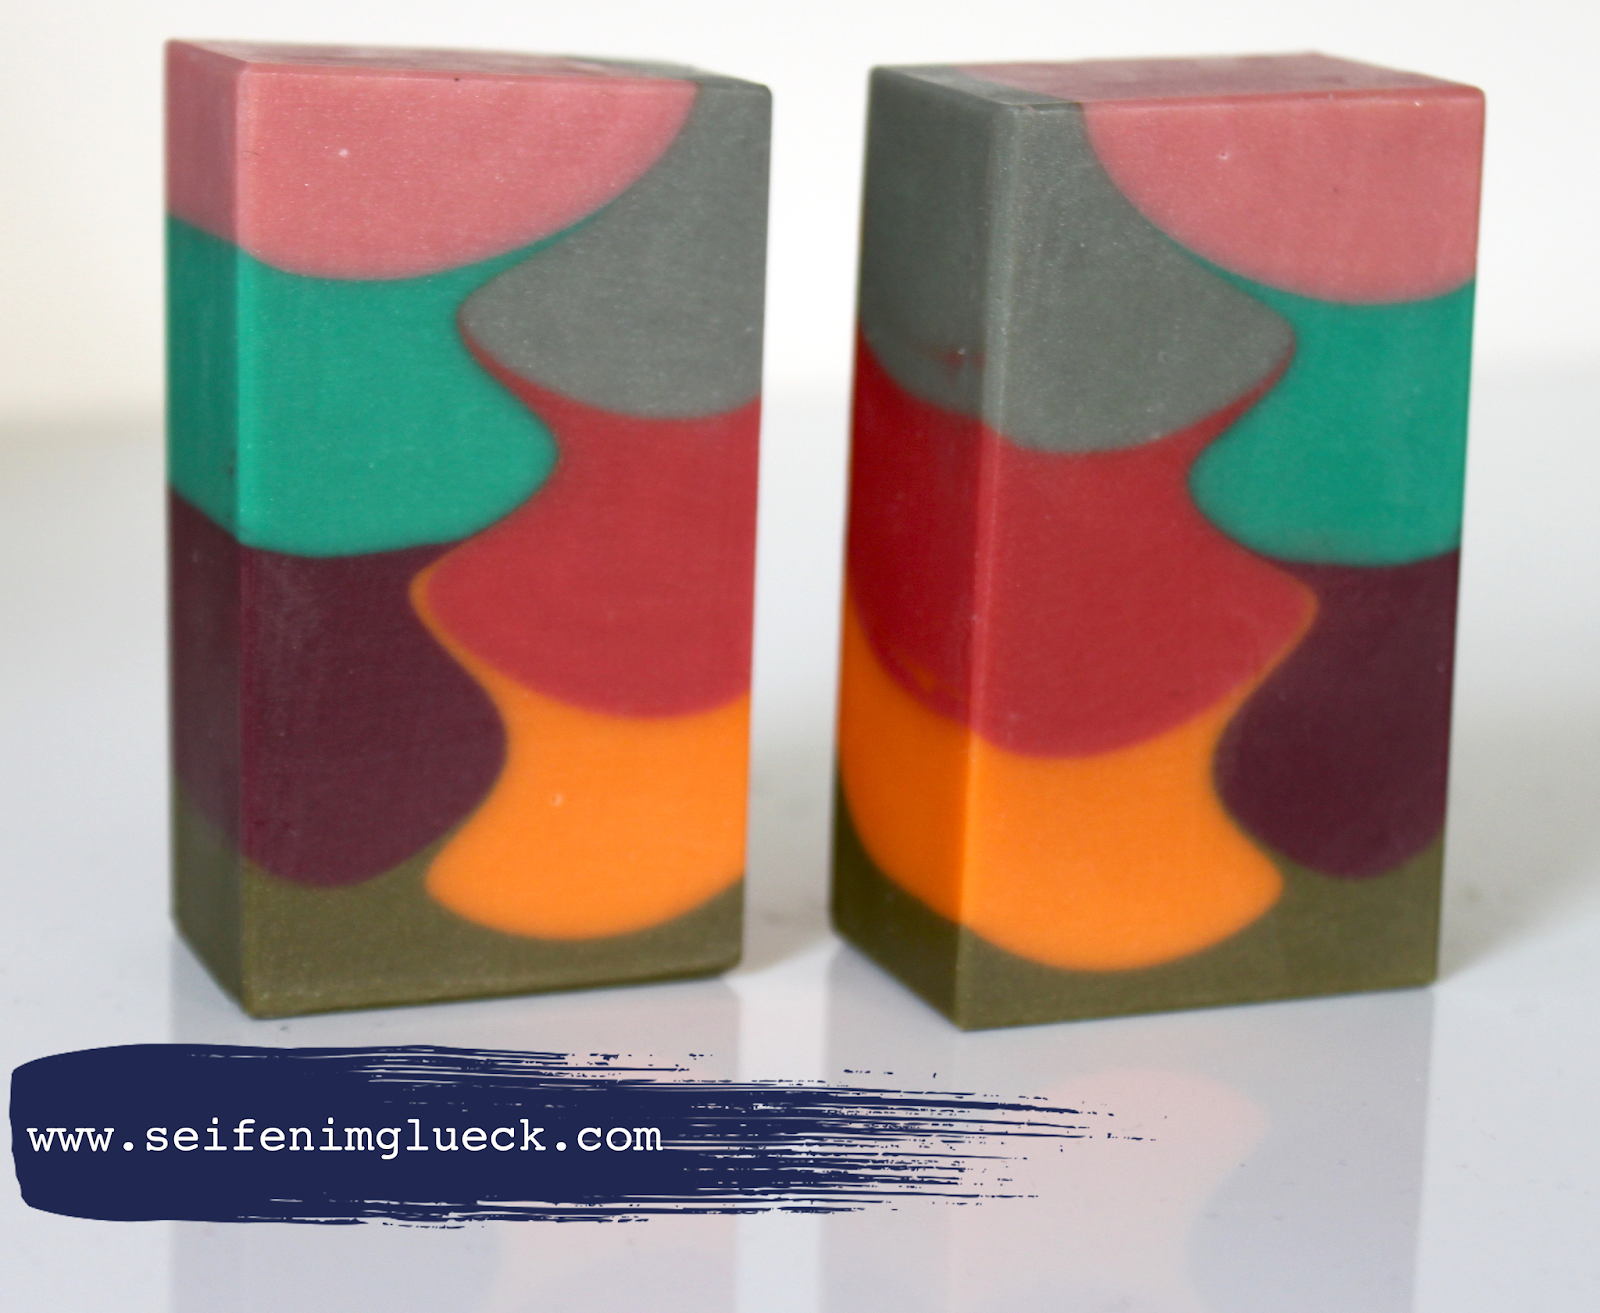
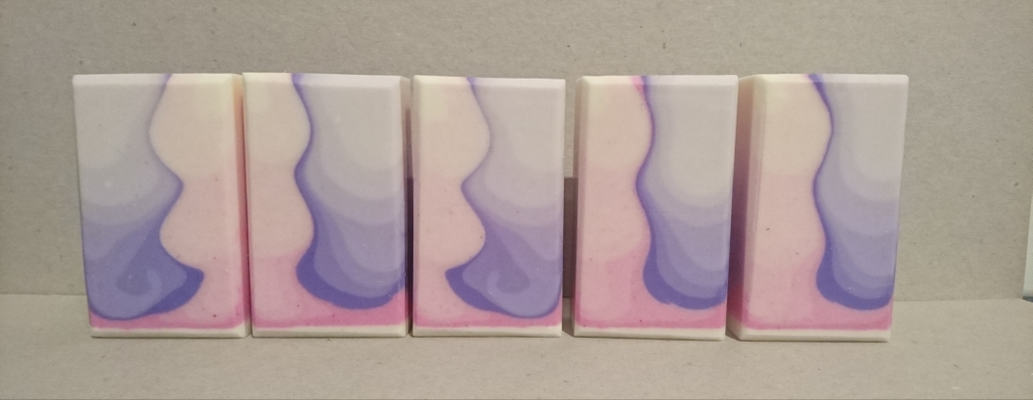
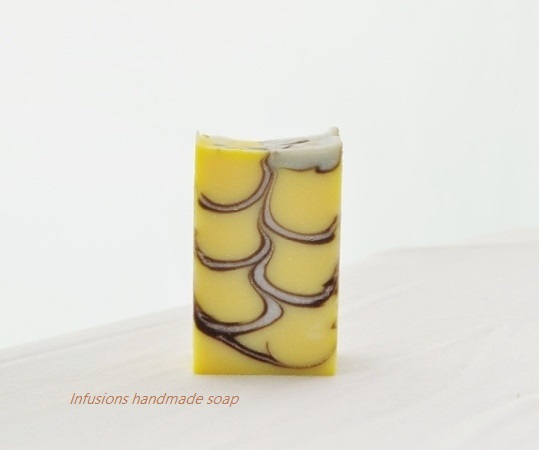
Welcome to the October 2020 SMF Soap Challenge. This month’s challenge is the Tall and Skinny Shimmy.
First of all, sorry for the delay, we just moved besides being busy, I didn’t have internet to upload the challenge, but at last, here it is!
PLEASE READ ALL RULES for the challenge.
SMF Challenge General Rules
1. To enter you must have a minimum of 50 posts and have been a SMF member for a month (sorry but no exceptions on this).
2. The only members eligible to vote are those with their names on the sign-up list - regardless of whether or not you have submitted an entry. The sign-up list will be posted in this thread.
3. This month’s voting will be password locked. Passwords will be sent by private message (via SMF conversations) to registered participants ONLY, so please check your messages when the voting begins.
4. Please do not post photos of your entry until the entry thread is opened. Non-entry photos are always welcome and may be posted in this thread. The challenge thread should be used to upload pictures of any of your challenge attempts (other than your entry) where you can ask for advice and discuss the technique with other members, and provide helpful hints you learned along the way.
5. Your soap must be made after the monthly challenge has been announced.
6. You are allowed to change your entry photo until the entry thread closes. If you decide you want another try after you post your entry, and you like the second better, you can change it up until the deadline.
7. In the spirit of advancing our soap making skills, all members who sign-up for an SMF Challenge do so with the expectation that they will make every attempt to make a soap for the challenge. Writing about your experience in the challenge is encouraged. By doing so, each participant has a better knowledge of your process when voting. We do understand that sometimes things come up in our lives and throw our plans out of whack, however signing up with no intent to participate and only to vote is not in the spirit of the challenges and is not allowed.
8. Please add your name to the sign up list if you wish to participate (you don’t have to enter a soap at the end if you don’t feel happy with what you have produced), but please do post your experiences in the main Challenge thread and be prepared to be encouraged to continue trying.
9. Constructive criticism is welcomed, but please keep your comments polite.
· Competition entries must be uploaded to the separate entry thread before the closing date. The entry thread will open on October 21, 2020 (Please follow the challenge specific rules as to what you need to enter).
· After the closing date on October 27, 2020 at 11:59 pm GMT the winning entry will be chosen using Survey Monkey. Voting will be open from October 28 through October 30, 2020 at 11:59 pm GMT, and the winner will be announced on October 31, 2020. There is no prize attached to this challenge.
· If you fail to make the challenge deadline, you are still welcome to upload pictures of your soap onto the thread, but your entry will not be eligible for voting. We always love to see anything you have created.
· Even though there is no prize, this is still a competition. If your entry is deemed not to fulfill the general rules or the rules specific to the challenge in any way, then you will be given the opportunity to amend your entry. If this is not possible, your entry will not be included in the voting.
· All the challenge mods reserve the right to have the final say on whether a soap is eligible for voting.
SPECIFIC RULES FOR THE October, 2020 CHALLENGE
1. You will make a soap by alternating pouring on opposite sides of your mold, while elevating the other side to create a curved S-shape through the middle of the soap (see instruction videos)
2. You can choose how many alternating wall pours you do (/blobs you make), but it should be a minimum of 5.
3. There’s no minimum amount of colors to be used for this challenge. I think this technique will benefit greatly from using at least 3 colors, but I’m curious if anyone can make a pretty soap with only 2.. or even just one color with a pencil line and/or a ghost swirl?
4. You can choose to do one color or multiple colors per wall pour, for example by doing an in the pot swirl or by alternating colors within the wall pour (e.g. doing 2 or 3 pours with different colors on one side before switching to the other side).
5. This technique works best in a tall and skinny mold. Use of a regular loaf mold is discouraged, but will not lead to disqualification.
6. Your entry picture should include at least 2 soaps from the same batch.
Helpful tips:
1. A very light trace is essential for this technique. It simply doesn’t work with medium or thick trace.
2. Make sure to pour along the wall of the mold.
3. Tilting the mold can be done with different tools and it takes a bit of experimentation to find out which thickness gives the best shimmy (higher tilt = more shimmy). A pencil has worked reasonably well for me, but I might go a bit thicker next time.
4. Dividing your batter into equal portions for the wall pours helps to get an equal distribution of ‘blobs’ to make a nice shimmy through the middle of the soap. Remember to account for a bit of loss of batter when dividing your soap (it’s impossible to get all your soap out of the pot and you don’t want to end up with one smaller blob at the end).
5. It helps to draw a color plan and line up your colors in pouring order, so you don’t get confused. It may sound silly, but pouring can get a bit confusing at times (especially with more elaborate color schemes)
6. Keep a hanger tool ready in case your batter accelerates. As mentioned before, this technique does not work when trace gets too thick, but a failed shimmy can easily become a beautiful hanger swirl!
7. Don’t worry if you mess up the pour, failed attempts can sometimes be just as pretty as successful ones (or prettier)
8. If you decide to do multiple pours with different colors before switching to the other side, be aware that the shimmy might be less pronounced, because you pour smaller amounts of batter with each pour than when you pour one wall pour/‘blob’ all at once (bigger pour = more shimmy in my experience). You could try to counteract this by tilting your mold more.
9. It is possible to do many different colored pours before switching sides (I’ve done up to 8). If you do a reasonable amount of pours per side/‘blob’ (say 3 different colors), making individual cups of soap for each individual color pour is probably the best way to go (so if you do 7 wall pours/‘blobs’ with 3 different color pours before switching sides, you would make 21 cups of soap). If you want to do a lot of different color pours before switching sides, putting your mold on a scale to weigh the amount you pour can help, so you don’t have to measure out a gazillion tiny amounts of soap in individual cups.
10. Although it’s important to make sure that the amount of soap poured before switching sides is equal every time (see tip 4), you can use different amounts of different colors within each ‘blob’ when doing multiple color pours before switching sides (for example, color 1: ¼ cup, color 2: ¼ cup, color 3: ½ cup - switch sides - and again color 1: ¼ cup, color 2: ¼ cup, color 3: ½ cup – switch). I’m not sure how to explain this well, please ask if something is not clear!
11. This technique can be combined with other techniques. I already mentioned an in the pot swirl, pencil lines or maybe even a ghost swirl (haven’t seen the latter yet!). Embeds are also possible and I can imagine a tiger stripe or one pot wonder technique could also be a fun combo with the tall and skinny shimmy. Be creative!
12. If you don’t have a tall and skinny mold, rather than using a regular loaf mold consider making your own mold from cardboard. It’s really easy and you can choose the size you want. You can cover the cardboard in tape to prevent it from losing shape in case some batter would seep out of your (paper) liner. I also tape the ends of my parchment paper liner, to prevent batter from seeping out. You can either use a cardboard (cereal) box with the right dimensions or make one from scratch to the dimensions you want (frozen pizza boxes work well)
Good luck everyone, and have fun! I'm looking forward to seeing what you make.
Last edited by a moderator:


