I need ideas/advice on how to make a mid-mod, 1950s, retro looking soap for a friend of mine. She wants either a starburst (like the wall clocks of the era) or a chevron like the grill ornaments of a big-fin car inside the soap. I’m attaching a sketch of the chevron type. I’m trying to figure out if tilting the loaf mold from side to side or using a divider somehow would do the trick. I just can’t figure this one out. If there was an embed mold that would be awesome. Anyone have any suggestions?
You are using an out of date browser. It may not display this or other websites correctly.
You should upgrade or use an alternative browser.
You should upgrade or use an alternative browser.
Need advice on a soap design
- Thread starter Kari Howie
- Start date

Help Support Soapmaking Forum:
This site may earn a commission from merchant affiliate
links, including eBay, Amazon, and others.
Here is a video of a soap made by Chez Helene. She did a chevron through the entire soap, but you might be able to figure something out from that. A starting point anyway.
Alternately I would think embeds made by pouring the embed color in a loaf mold and cut to the right shape could work.
Alternately I would think embeds made by pouring the embed color in a loaf mold and cut to the right shape could work.
Here is a video of a soap made by Chez Helene. She did a chevron through the entire soap, but you might be able to figure something out from that. A starting point anyway.
Alternately I would think embeds made by pouring the embed color in a loaf mold and cut to the right shape could work.
Thank you soooooo much!! Those are great suggestions!
If you decide to try the tilted mold method, an accelerating FO is going to be the savior. If you use one that doesn't accel, it might take you hours to get the pour done! When I do gradient or ombre pours I only do them with accelerating FO's. I did it one time without and it took me over an hour to get it done.
For the starburst, I have a couple of ideas.
You could create a tool for a pull-through method, using something like mylar sheets, a sharpie marker and an exacto knife. Draw the design, cut it out to create a hole in the shape of the starburts. Attach something heavy around the outer edges to hold the starburst template at the bottom of your mold while you pour the soap batter; also attach something to pull it up & out of the batter (like steel wires, for example).
A modified column pour could be achieved with a column in the shape of a star burst, but you'd have to find a starburst 'column' tall enough (about 2.5 inches high, I would estimate.)
Thank you! Another great tip! I’ve been trying to figure this out by myself for awhile now. Glad I turned to the pros!

$24.96 ($0.31 / Ounce)
$32.00 ($0.40 / Ounce)
Primal Elements White Soap Base - Moisturizing Melt and Pour Glycerin Soap Base for Crafting and Soap Making, Vegan, Cruelty Free, Easy to Cut, Unscented - 5 Pound
Amazon.com

$8.62
$14.99
The Natural Soap Making Book for Beginners: Do-It-Yourself Soaps Using All-Natural Herbs, Spices, and Essential Oils
Amazon.com

$16.95 ($4.24 / Fl Oz)
Pure Body Naturals French Lavender Essential Oil Blend, 4 fl oz - for Aromatherapy, Soap Making, and DIY Skin and Hair Products
Pure Body Naturals®

$37.95 ($0.34 / Ounce)
COCONUT 76 Oil. Soap making supplies. 7 pound Gallon.
Traverse Bay Bath And Body

$25.99 ($0.32 / Ounce)
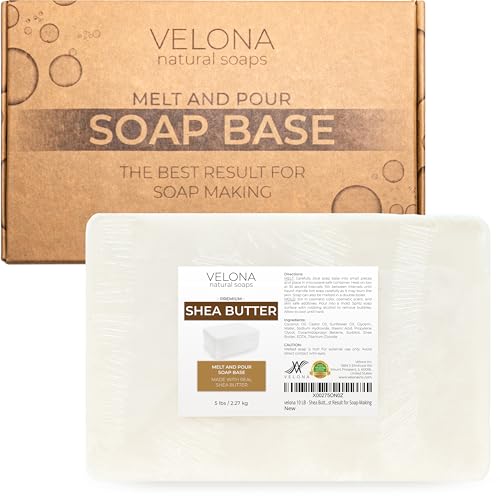
velona 5 LB - Shea Butter - Melt and Pour Soap Base SLS/SLES free | Natural Bars for The Best Result for Soap-Making
Velona

$18.99 ($0.59 / Fl Oz)
Parachute Naturalz Virgin Coconut Oil | 100% Organic Cooking Oil, Hair Oil and Skin Oil | Cold Pressed | USDA Certified | 32 Fl. Oz | Plastic Jar
Marico Ltd. (Manufacturer/ Brand owner)

$7.99 ($2.00 / Fl Oz)
$9.99 ($2.50 / Fl Oz)
SilkySecret Peppermint Essential Oil (4 Fl Oz), Mint Oil for Hair Care, Skin Massage, Aromatherapy and Sprays, Relieves Muscle Pain, Refreshes
Saahow

$7.99
$9.99
KT THERMO Instant Read 1-Inch Dial Thermometer,Best for The Coffee Drinks,Chocolate Milk Foam
BestPartners

$11.99 ($3.00 / Fl Oz)
Ethereal Nature 100% Pure! Peppermint Oil – Perfect For Aromatherapy Diffusers, Skin, Nail and Hair Care – Beauty DIY – 4 FL OZ
Amazon.com

$14.39 ($7.05 / Fl Oz)
$16.99 ($8.33 / Fl Oz)
P&J Trading Fragrance Oil Gentlemen's Set | Leather, Sweet Tobacco, Teakwood, Bay Rum, Cedar, Sandalwood Candle Scents for Candle Making, Freshie Scents, Soap Making Supplies, Diffuser Oil Scents
P and J Trading

$35.74 ($0.32 / Ounce)
Nature's Oil Coconut 76 Degree, Naturally Refined, 7lbs (1 Gallon)
Bulk Apothecary

$18.99 ($37.98 / Fl Oz)
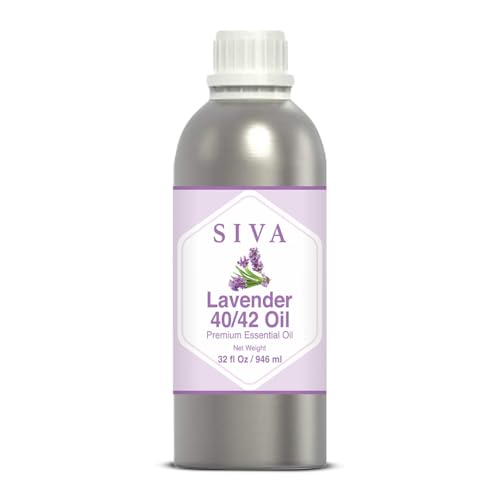
US Organic 100% Pure Lavender Essential Oil, Directly sourced from Bulgaria, USDA Certified Organic, Undiluted, for Diffuser, Humidifier, Massage, Skin, Hair Care, Non GMO, 15 ml
US Organic Group Corp
I’m attaching a sketch of the chevron type. I’m trying to figure out if tilting the loaf mold from side to side or using a divider somehow would do the trick. I just can’t figure this one out. If there was an embed mold that would be awesome. Anyone have any suggestions?
You could create a chevron using dividers you could design yourself. Coroplast or mylar, or even cardboard would work.
Could you send me a sketch of what you’re describing?You could create a chevron using dividers you could design yourself. Coroplast or mylar, or even cardboard would work.
I’m visual. Need pictures.Could you send me a sketch of what you’re describing?
Not so good at drawing on computer, so don't laugh. Okay, you can laugh, but don't taunt.I’m visual. Need pictures.
Using your drawing, I created blue lines where mold dividers could be placed inside a rectangular mold. It would probably need one or two other walls for support. I am not an engineer, so off the top of my head, I'm not coming up with the best way, I am sure, but in hands-on practice with some paper and a box, I'm sure a design concept would fall into place.

Here is a video showing how to make DIY soap mold dividers. You can adapt the design. Perhaps try it with some card stock or printer paper until you get the concept to work inside a mold the size of your choice.
For smaller individual molds, mylar sheets would probably be better than using thicker corrugated plastic or cardboard.
I hope that helps.
Not so good at drawing on computer, so don't laugh. Okay, you can laugh, but don't taunt.
Using your drawing, I created blue lines where mold dividers could be placed inside a rectangular mold. It would probably need one or two other walls for support. I am not an engineer, so off the top of my head, I'm not coming up with the best way, I am sure, but in hands-on practice with some paper and a box, I'm sure a design concept would fall into place.
View attachment 39320
Here is a video showing how to make DIY soap mold dividers. You can adapt the design. Perhaps try it with some card stock or printer paper until you get the concept to work inside a mold the size of your choice.
For smaller individual molds, mylar sheets would probably be better than using thicker corrugated plastic or cardboard.
I hope that helps.
Thank you so much, Earlene! Now, thanks to everyone, I have some tools I can actually work with!
Kari, I'm glad that you understood what I was trying to describe. It was the middle of the night for me, as I'd been up since 5:30 am yesterday and I was getting pretty tired by then.
A
amd

I made this in five pours - and yes it was a pain in the butt! Fortunately it was a large batch so I could make each pour as a separate batch. The soap did split where the mica lines are. I repeated this design again in another soap without the mica lines and it held together - I suspect my mica line was too thick as I don't usually have that problem.
When I do this design again I'm going to try doing it in 1 pour and using a cutout to shape each layer rather than tilting it, so I could do it in 3 pours and half the time. It's a bit of a waste doing it that way, but might be more efficient.
Sculpted layers might work, too. For this soap I poured a layer of dark blue, let it set up to thick trace then used a piece of coroplast I'd cut out to scoop out the middle of the soap leaving a "V." Then I poured a lighter blue layer, used another piece of coroplast that fit that layer and scooped out the soap, and so forth (as an aside, I only did half of it one day, then removed it from the mold the following day and repeated the process. Once that was done, I place day one's soap - inverted - back on top, gelled the whole thing and prayed it would stay together while in use - it did, thankfully!).
This blog link gives a really good overview of sculpted layers (and a truly gorgeous soap!).
This blog link gives a really good overview of sculpted layers (and a truly gorgeous soap!).
Attachments
Similar threads
- Replies
- 107
- Views
- 6K
- Replies
- 79
- Views
- 4K
- Replies
- 136
- Views
- 6K
- Replies
- 46
- Views
- 4K
- Replies
- 148
- Views
- 10K


